Overview
In this OBE, you learn how to connect to the Administration Tool, import the Essbase BISAMPLE cube into the Physical layer of the repository, build the Business Model and the Subject area, and create analyses from the objects in the Subject area.
Prerequisites
Before starting this tutorial, you should:
| 1. | Have access to or have Installed Oracle BI Suite EE 11.1.1.5 |
|---|---|
| 2. | Have access to or have Installed Oracle Essbase 11.1.2.1 |
| 3. | Have access to or have installed the Oracle Sample Application for Oracle BI EE. Note: This tutorial uses the Essbase BISAMPLE cube from the Sample Application for Oracle BI EE |
Importing a Multidimensional Data Source into a Repository
In this topic, you import the Essbase BISAMPLE cube into the repository, create a business model and subject area, and verify the results in Analysis Editor. This topic describes how to use the Administration Tool, import cubes, and create the Business Model and Mapping and Presentation layers.
Starting Essbase Server
| 1. | Select Start > Programs > Oracle EPM System > Essbase > Essbase Server > Start Essbase. The Start Essbase command window is displayed. |
|---|---|
| 2. | Wait for processing to complete and for the command window to close. |
| 3. | Right-click the desktop taskbar and select Task Manager to open the Windows Task Manager. |
| 4. | Click the Processes tab. |
| 5. | Verify that an ESSBASE.exe process is visible.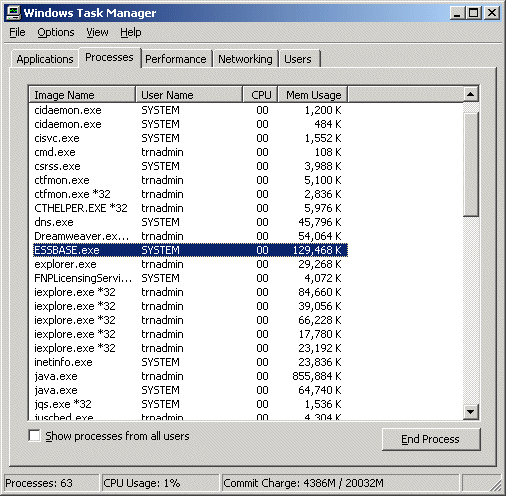 |
| 6. | Select File > Exit Task Manager to close Windows Task Manager. |
Importing an Essbase cube into the repository.
| 1. | Select Start > Programs > Oracle Business Intelligence > BI Administration. The Oracle BI Administration Tool window is displayed. |
|---|---|
| 2. | From the toolbar, click the Open Online ( The Open Online coreapplication_OH601898404 dialog box is displayed. Note: The name of the dialog box will differ depending on your installation. |
| 3. | Enter Admin123 into the Repository Password field and a valid username and password to access BI Server, and click Open. The BI Repository layers are displayed. |
| 4. | Select File > Import Metadata. The Select Data Source page of the Import Metadata wizard is displayed.  |
| 5. | From the Connection Type list, select Essbase. The page displays the Essbase connection fields.  |
| 6. | Enter the name of the Essbase server, a valid user name and password for the data source, and click Next. |
| 7. | In the Data source view section, expand the data source node and select BISAMPLE. |
| 8. | Click the Import selected ( The BISAMPLE data source is added to the Repository View section. |
| 9. | Optional: In the Repository View section, expand the BISAMPLE data source to verify that all its metadata objects are added. |
| 10. | Click Finish. The data source is added to the repository. |
| 11. | Optional: In the Physical layer, expand the added Essbase data source and verify that the BISAMPLE metadata objects are added. |
Exploring the multidimensional schema in the Physical layer
| 1. | In the Physical layer, right-click the added Essbase data source and select Rename. |
|---|---|
| 2. | Rename the data source to Essbase - BISAMPLE. |
| 3. | Right-click BISAMPLE and select Expand All. Note: When you import metadata from Essbase data sources, the cube metadata is mapped to the Physical layer in a way that supports the Oracle Business Intelligence logical model. Metadata that applies to all members of the dimension, such as aliases, are modeled as dimension properties by default. Level-based properties, such as outline sort / memnor information, are mapped as separate physical cube columns in the dimension. Column types such as Outline Sort, Ancestor Ref, Member Key, Leaf, Root, and Parent Reference are used internally by the system and should not be changed. |
Converting the Measure dimension to flat measures
By default, measures are imported as measure hierarchies. The cube contains a single measure column that represents all the measures. Alternatively, you can choose to flatten the measure hierarchy to view each measure as an individual column.
| 1. | Right-click the BISAMPLE cube object and select Convert measure dimension to flat measures. All measures are now displayed under the BISAMPLE cube table as columns.  |
|---|---|
| 2. | From the BI Administration Tool toolbar, click the Check In Changes ( The changes to the Physical layer are saved to the repository. |
Verifying the connection to the Essbase data source
| 1. | Expand the Customers physical dimension to select the Customer Segment level..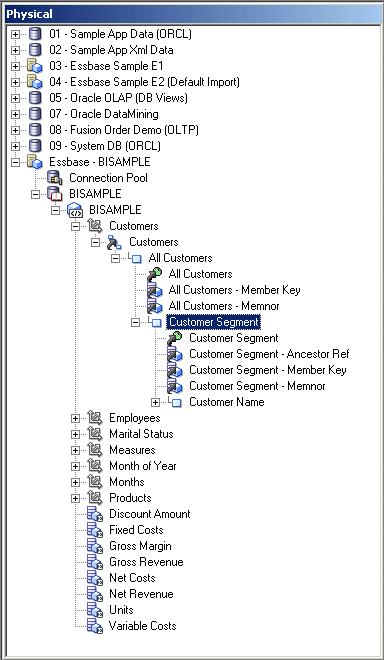 |
|---|---|
| 2. | Right-click Customer Segment and select View Members. The members of the Customer Segment level are displayed in a new window..  |
| 3. | Click Close. |
Creating the business model
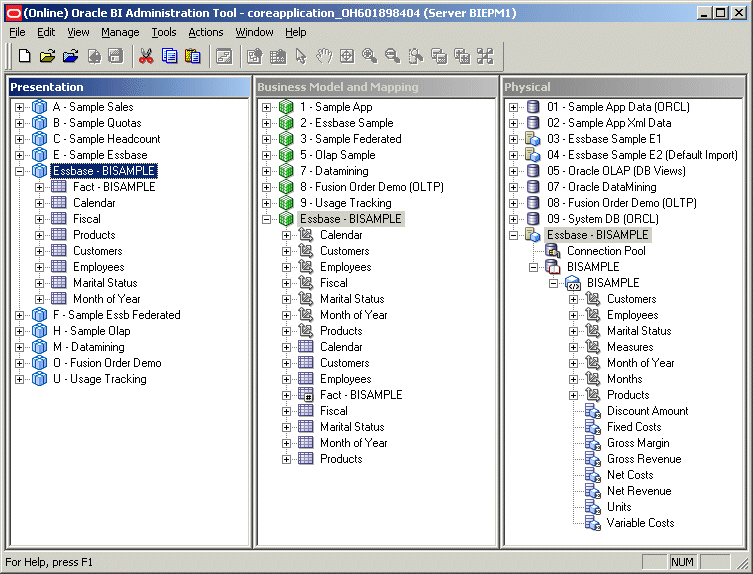
| 1. | Drag the Essbase - BISAMPLE physical cube to the Business Model and Mapping layer. The business model and all its objects are created for you, including dimension hierarchies, logical dimension tables, logical fact tables, logical columns, logical joins, and so forth. Notice that the BISAMPLE logical table has a hash sign, indicating that it is the fact table in the logical schema. |
|---|---|
| 2. | Right-click the BISAMPLE logical table and select Rename. Rename the table as Fact-BISAMPLE. |
Creating the subject area
|


Performing Ad Hoc Analysis on the Imported Data Source
This topic shows you how to create ad hoc queries from the Essbase BISAMPLE subject area.
Creating a simple query
This subtopic shows you how to create an analysis. Analyses allows you to explore and interact with information, and present and visualize information using charts, pivot tables, and reports. You can save, organize, and share the results.
Requests that you create can be saved in the Presentation Catalog and integrated with any Oracle BI home page or dashboard. Results can be enhanced through charting, result layout, calculation, and drill down features.
| 1. | In the browser, enter the following URL to access Oracle BI: http://<server_name>:7001/analytics 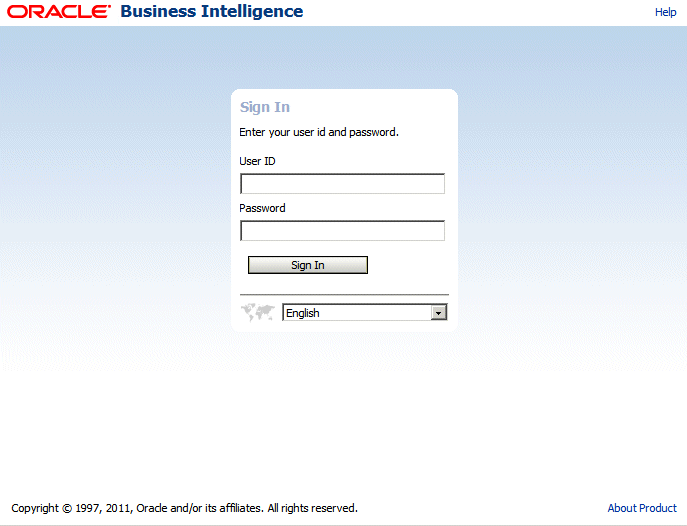 The Oracle Business Intelligence Sign In window is displayed. |
|---|---|
| 2. | Enter your user ID and password to sign in to Oracle BI. The Oracle BI Home page is displayed. |
| 3. | Click Analysis to select a subject area. |
| 4. | Click Essbase - BISAMPLE. |
| 5. | Expand Fiscal and double-click Gen3,Fiscal. Gen3,Fiscal is added to the Selected Columns pane. |
| 6. | Expand Products and double-click Brands.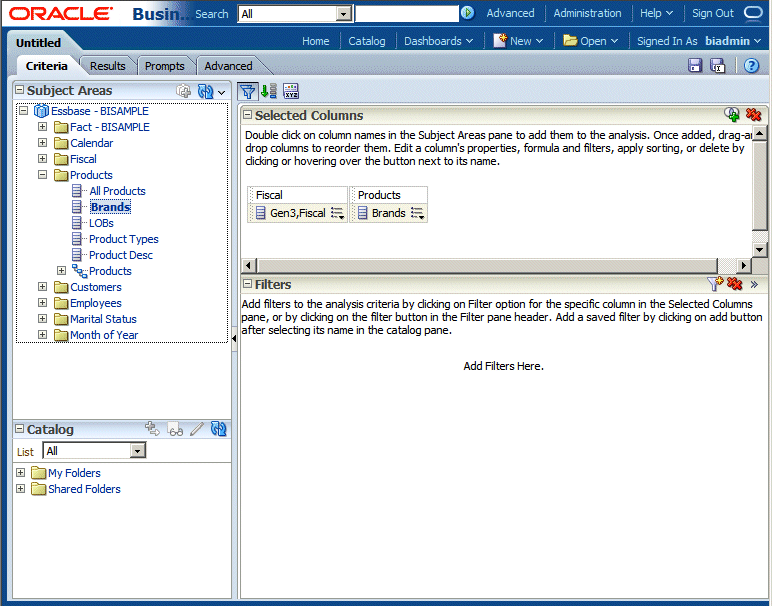 Brands is added to the Selected Columns pane. |
| 7. | Expand Fact - BISAMPLE and double-click Gross Revenue and Gross Margin..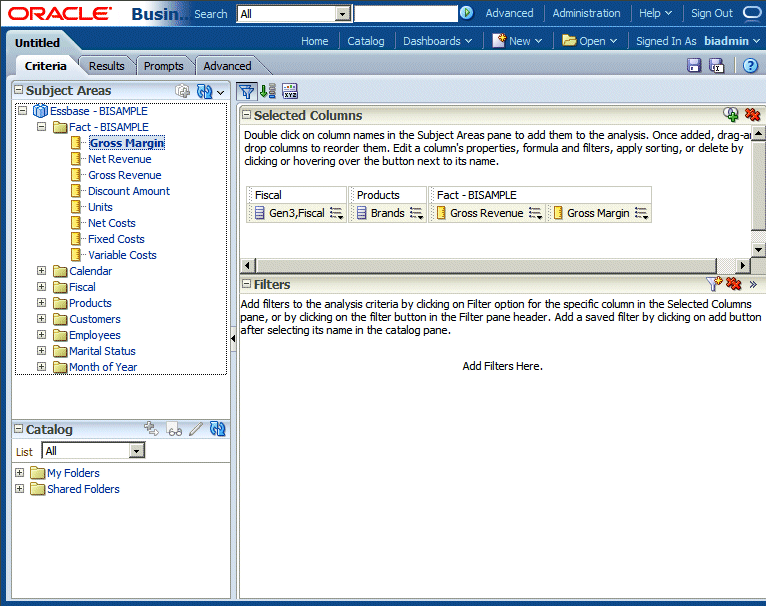 Gross Revenue and Gross Margin are added to the Selected Columns pane. |
| 8. | Click the Results tab.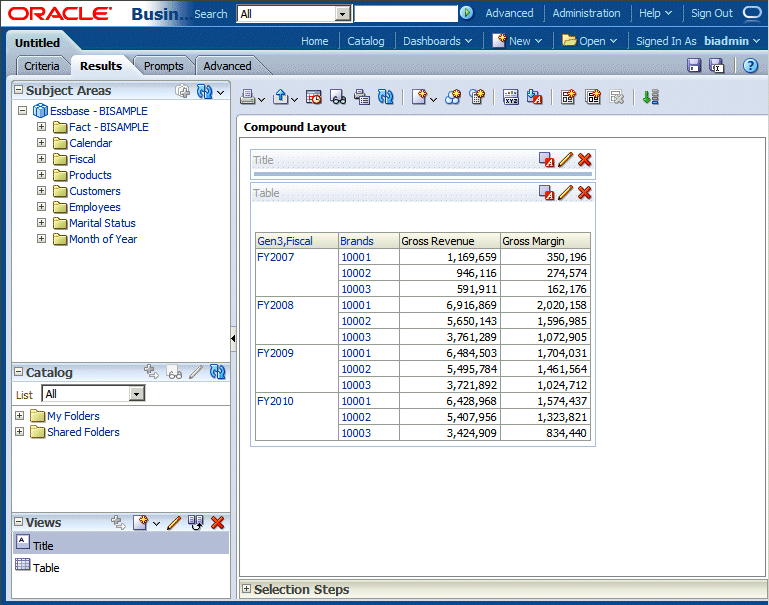 By default the query results are displayed in the Compound Layout format that includes Title and Table sections. |
| 9. | Click the Edit View (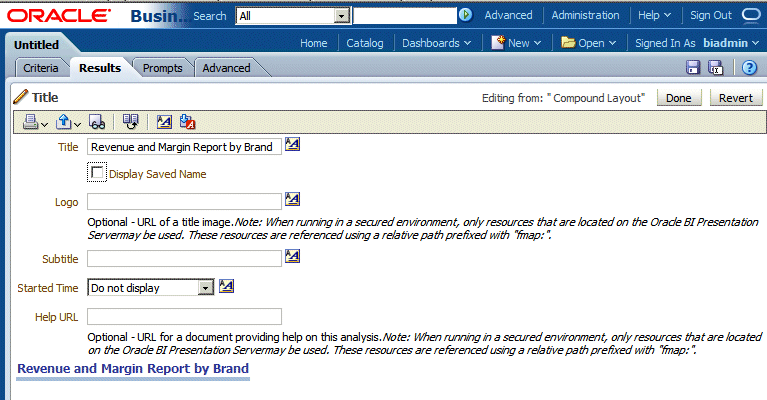 Your title is added to the report. 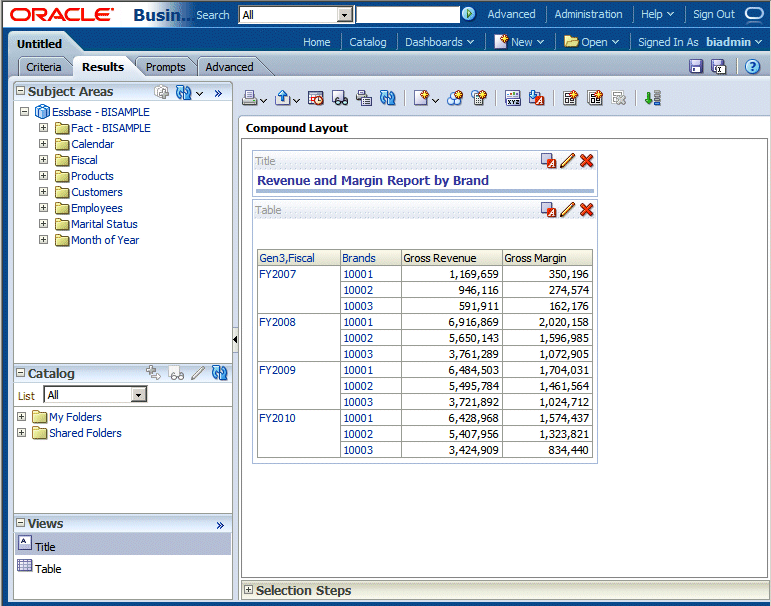 |
Creating a simple chart
| 1. | Click the New View ( The horizontal bar chart is displayed below the table.  |
|---|---|
| 2. | Click the Save Analysis (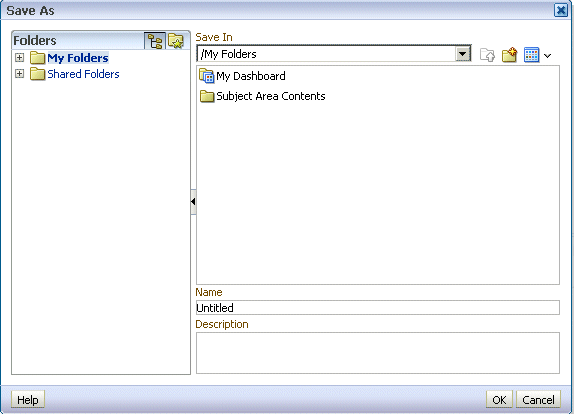 |
| 3. | In the Name field enter Revenue and Margin Report by Brand and click OK. |
Summary
In this tutorial, you have learned how to:
- Import an Essbase data source into a BI repository
- Perform an ad hoc analysis on an Essbase data source