Overview
Oracle Business Intelligence Delivers (Delivers) is the interface that is used to create alerts based on Oracle Business Intelligence Analyses. Oracle BI Analysis Editor is a set of graphical tools that are used to build, view, and modify Oracle BI analyses. The analysis are queries against an organization’s data. You can use Delivers to detect specific results and notify appropriate persons or groups using the web, wireless, mobile, and other communication channels.
Delivers works in tandem with Oracle Business Intelligence Scheduler.
This tutorial provides step-by-step procedures to create alerts based on the BI EE results in the dashboard, which are communicated to the mail recipient as well.
The example in this tutorial covers installing the required Mail Server (ArGoSoft), configuring the eMail client (Outlook Express for this example), and then creating Delivers to be communicated to the respective eMail recipients.Prerequisites
Before starting this tutorial, you must perform the following:
- Download the files zip file and unzip it in a folder with the same name.
- Have Outlook Express on your machine.
- Complete the tutorial Creating Analyses and Dashboards OBE.
- Install the required software.
The assumption throughout this course is that you are familiar with the basic user interface and navigation of Oracle BI EE.
Software Requirements
The following is a list of software requirements:
- Microsoft Outlook Express
- Oracle BI EE 11g installed on a machine
- Oracle BI EE 11g connection to a supported data source
Note: This tutorial is suitable only for the Windows environment.
Installing the ArGoSoft Mail Server
In this topic, you will install the ArGoSoft Mail Server Freeware only for demonstration purposes. If you do not have a Mail Server, perform the following steps:
| 1 . | Unzip the Mail Server file from files.zip on your local machine. |
|---|---|
| 2 . | Navigate to the directory where you downloaded the file and double-click agsmail.exe. Follow vendor instructions for installation. This should not take very long because it is a light installation. After the installation is complete, you can see the application's icon on your desktop. |
| 3 . | Double-click the ArGoSoft Mail Server icon on your desktop to start the Mail Server. The Mail Server window opens. 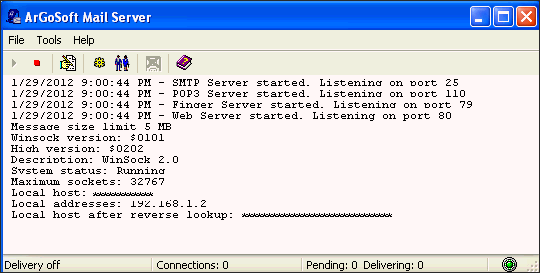 |
| 4 . | Select Tools > Users on the menu bar.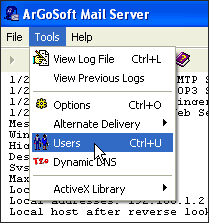 The User Setup window appears. |
| 5 . | a. In the User Setup window, click the New User icon.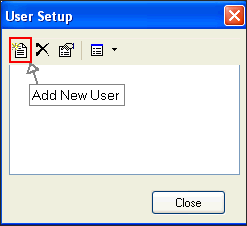 The Add New User window appears. By default, the General tab is selected. b. Enter user in the User Name field. c. Enter Delivers User in the Real Name field. d. Enter user in the Password and Confirm Password fields. e. Enter user@<yourmachine> in the Return Address field, where <yourmachine> is the name of your machine's domain configuration. 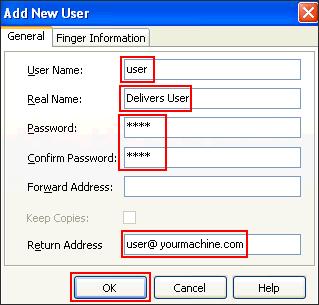 f. Click OK. g. The newly created user appears in the User list. Click Close to close the User Setup windows. 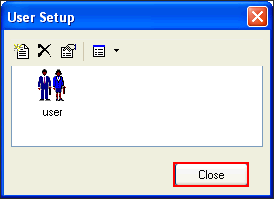 |
| 6 . | Now, you must set the host and ports for the Mail Server. a. Select Tools > Options on the menu bar. The Options window appears.  b. On the General tab, enter <yourmachine> in the Local Host field.  c. On the Local Domains tab, enter <yourmachine> in the available text box and click Add. 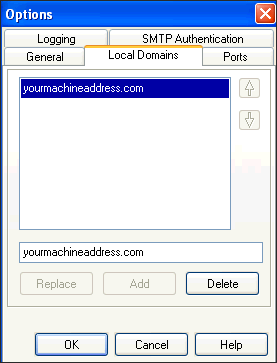 d. On the Ports tab, ensure that SMTP is set to 25 and POP3 is set to 110, both defaults. 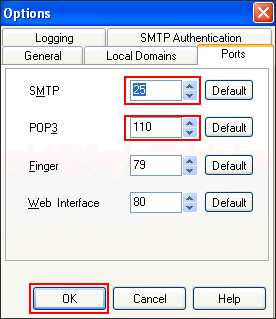 e. Click OK, and close the window. |
Configuring the eMail Client
This OBE uses MS Outlook Express. Ensure that all user properties correspond to the information annotated in the preceding section. To do so, perform the following steps:
| 1 . | Launch Outlook Express. Ensure that all user properties correspond to the Mail Server settings given in the previous section. Outlook Express opens. Note: Screenshots for this tutorial were taken in a Windows XP environment; therefore, Start Menu options may vary slightly depending on the operating system. |
|---|---|
| 2 . | Select Tools > Accounts on the menu bar. |
| 3 . | The Internet Accounts window appears. Click Add.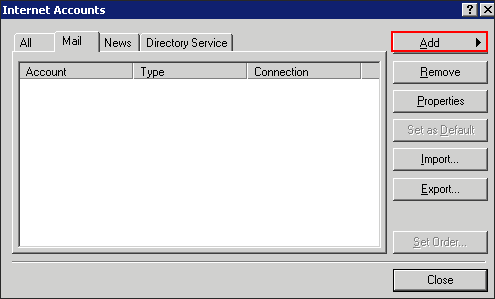 Select Mail from the list.  |
| 4 . | Enter user in the Display name field and click Next.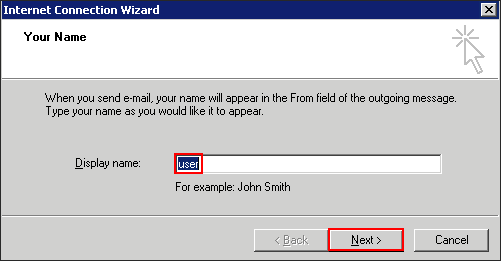 |
| 5 . | Enter the eMail address that you configured with your Mail Server, user@<yourmachine>, and click Next. In this example, it is user@localhost.com. 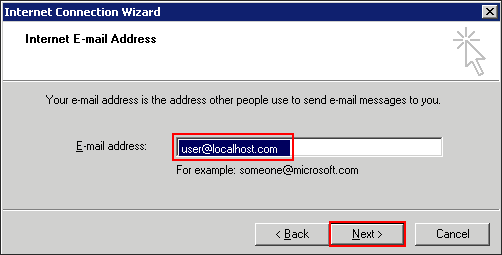 |
| 6 . | Enter the eMail Server names, <yourmachine>, for both the Incoming POP3 server and the Outgoing SMTP server. Click Next.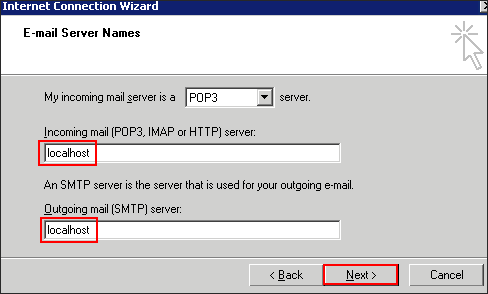 |
| 7 . | a. Enter user in both the Account name and Password fields and click Next.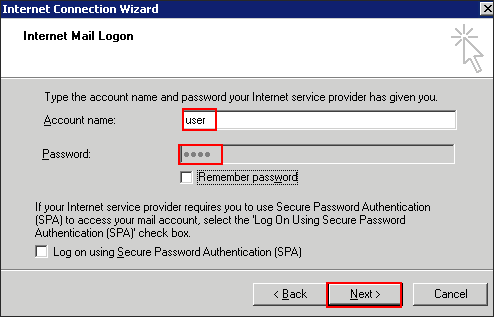 b. Click Finish. Your account is set up. 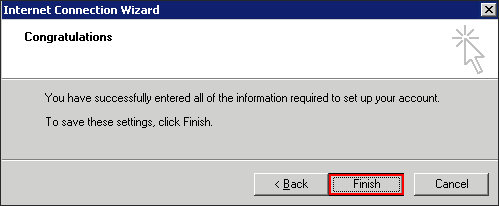 |
| 8 . | To check the properties for user, select Tools > Accounts, select user, and click Properties. The General and Servers tabs should look similar to the following screenshots: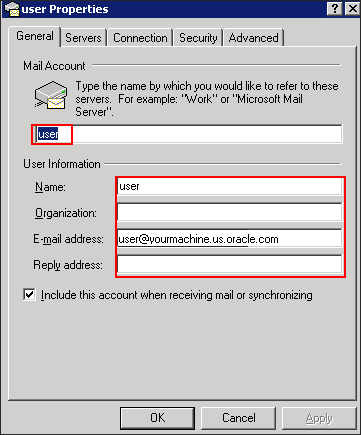 and  |
Creating a New Analysis
This topic demonstrates how to create a new analysis and how to display it on a dashboard.
Using Analyses, you can explore and interact with information by visually presenting data in tables, graphs, pivot tables, and so on. You can include the views that you create in an analysis for display on dashboards.
| 1 . | a. Log in to Oracle BI Enterprise Edition.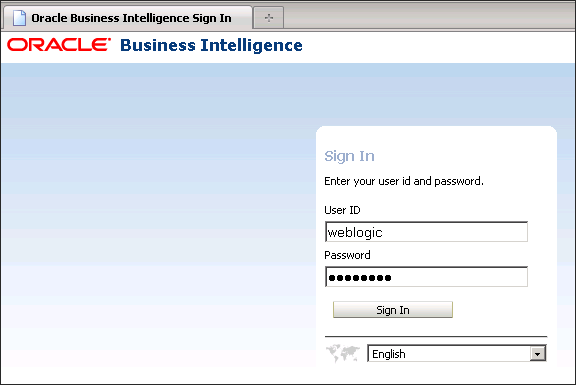 |
|---|---|
| 2 . | You will have to create a new folder for this OBE practice. Navigate to the Catalog page from the Global Header and create this folder. a. On the Catalog page, navigate to Shared Folders > Sample Lite > Published Reporting. 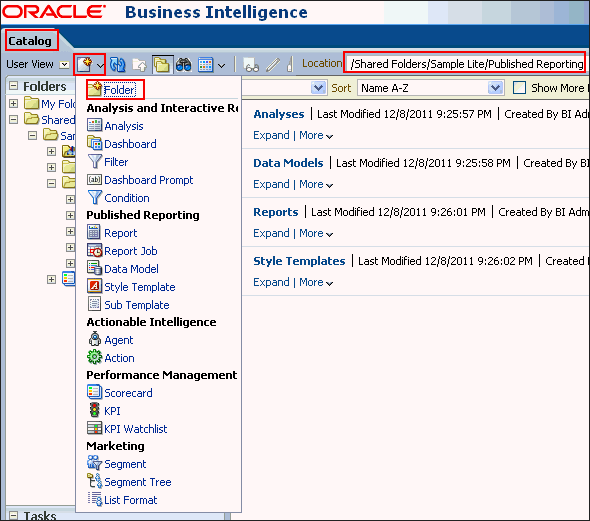 b. Click the New icon  and click the Folder and click the Folder  icon. icon. |
| 3 . | In the New Folder dialog box, name the new folder Learn and click OK. The newly created Learn folder is displayed in Catalog page.  You will save your analysis, dashboard, and alerts in this folder. |
| 4 . | Create a new analysis. In the Global Header, click New > Analysis.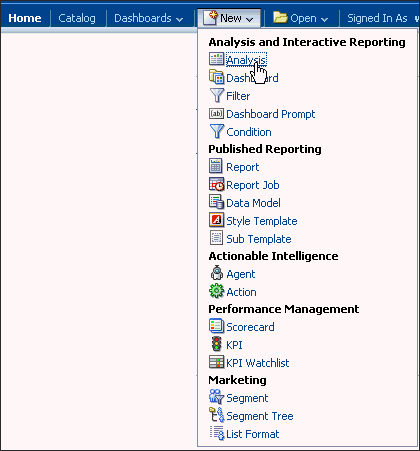 You will be asked to select a subject area indicating the data set. Select Sample Sales Lite. 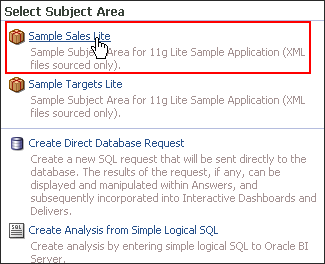 |
| 5 . | The BI Answers window opens. It contains the Subject Areas, Catalog, Columns, and Filter sections. The chosen subject area, Sample Sales Lite, displays the included tables. You will have to choose a base fact and other tables to create an analysis. |
| 6 . | a. On the Criteria tab, select Per Name Year from the Time folder in Subject Areas and drag it to the Selected Columns area. (You can also double-click the column names to get it in the Columns area.)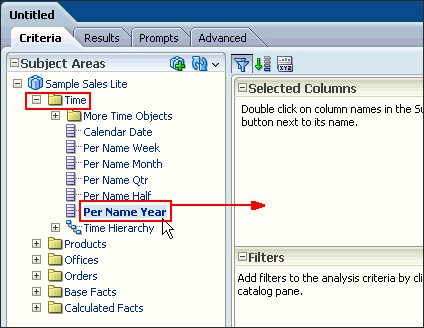 b. Select Product from the Products folder and drag it to the Selected Columns area. 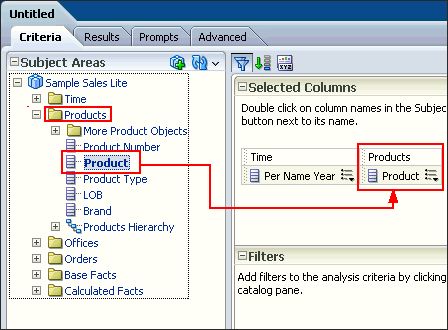 b. Select Revenue from the Base Facts folder and drag it to the Selected Columns area. 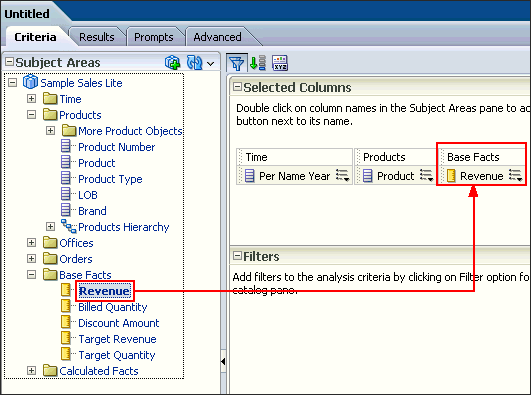 |
| 7 . | a. Click the Results tab to view the selected tables in Compound Layout.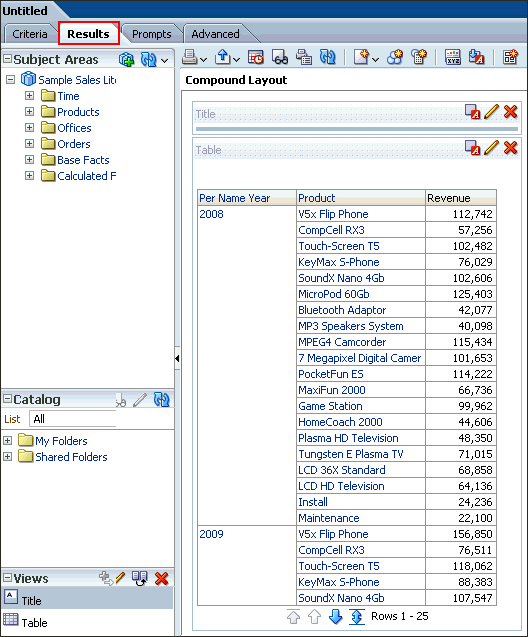 b. Save this analysis in the Learn folder with the file name My Revenue Analysis. 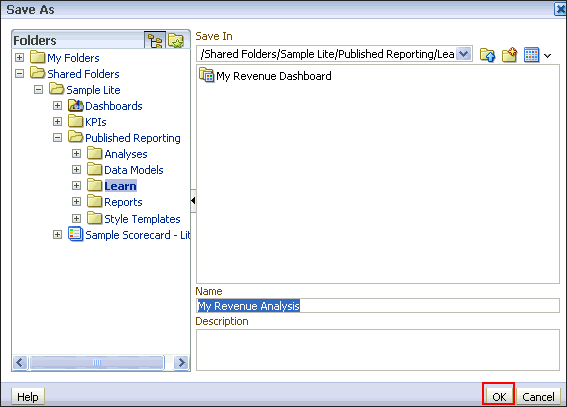 |
| 8 . | In the Global Header, click New > Dashboard.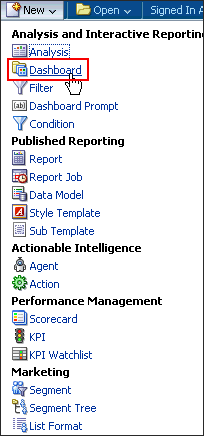 |
| 9 . | You will be prompted to choose a name and location for the new dashboard. Enter values as shown in the following screenshot. Make sure that you select the Add content now option, and then click OK. The new dashboard is displayed.  |
| 10 . | Add a Column and a Section with Text as My Revenue Dashboard. |
| 11 . | Add another Section and add the recently created analysis My Revenue Analysis to this section.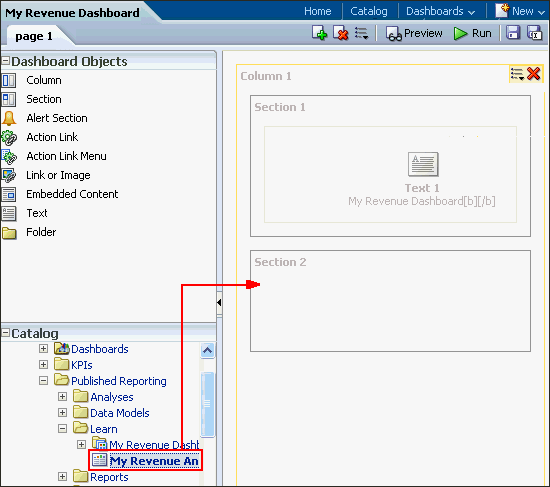 |
| 12 . | a. Click the Save icon to save the Dashboard with the added contents.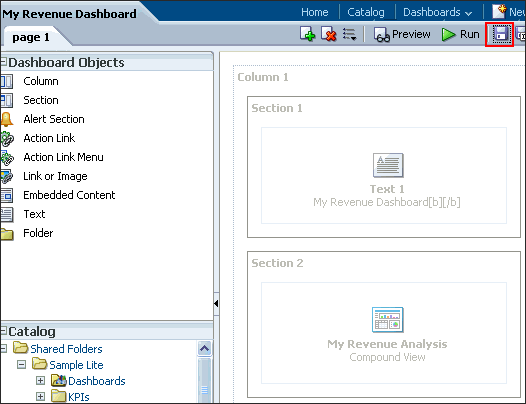 b. Click Run to view the dashboard.  My Revenue Dashboard is displayed. 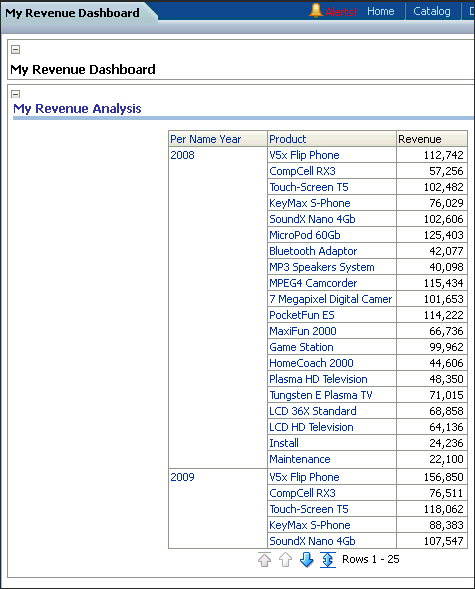 |
Creating a Condition-Based Agent/Alert
Agents enable you to automate your business processes. You can use them to provide event-driven alerting, scheduled content publishing, and conditional event-driven action execution. Agents can dynamically detect information-based problems and opportunities, determine the appropriate individuals to notify, and deliver information to them through a wide range of devices (eMail, phone, and so on).
In the simplest format, an agent automatically performs a specified catalog analysis based on a defined schedule, and examines the results for a specific problem or opportunity. If the specific problem or opportunity is detected in the results, an alert is generated and delivered to specified recipients and to subscribers to the agent, using the delivery options that are specified for each person.
This topic covers how to create an alert/agent based on a condition and how to define the destination for both the dashboard and the eMail Client.
| 1 . | You will have to set the Delivery Options for the Oracle BI EE Account settings as Email. In the Global Header, click weblogic, and then click My Account.  |
|---|---|
| 2 . | a. Click the Delivery Options tab and select Email from the Devices drop-down list. b. Click the Add icon. |
| 3 . | In the Create Device window, add details as shown in the following screenshot and click OK.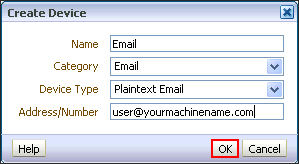 The Email Device is listed.  |
| 4 . | a. Click the Add icon for Delivery Profiles. b. Enter details for the Delivery Profile as shown in the following screenshot. Click OK.  c. Both the Email Device and Delivery Profile are listed on the Delivery Options tab. Click OK. 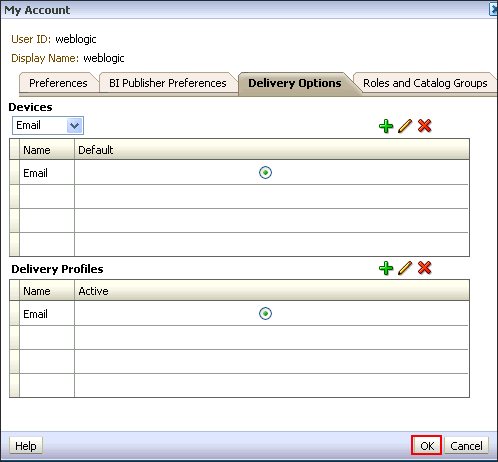 Now create an agent to create and deliver the alert by using Oracle BI Delivers. |
| 5 . | Click New in the Global Header and select Agent to navigate to the Agent Editor.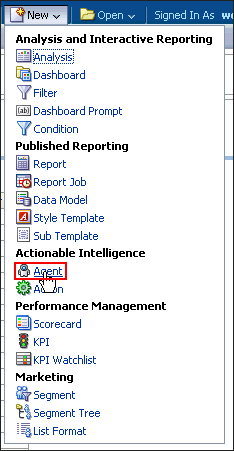 |
| 6 . | In the Agent Editor, start with the General tab to specify the priority of the agent and how to send the delivery content. Select the following options:
 |
| 7 . | Click the Schedule tab and verify that scheduling is enabled, Frequency is set to Once, and the Start date and time are set to the current date and time. |
| 8 . | On the Condition tab, select the Use a condition option and click Create. The Create Condition dialog box appears. |
| 9 . | a. In the Create Condition dialog box, select Analysis from the Create condition based on drop-down list and click Browse to select the analysis. In this example, you must choose the recently created My Revenue Analysis. b. Navigate to the Learn folder and select My Revenue Analysis. Condition Data is displayed as the selected analysis. Now you also see the condition operator drop-down list. 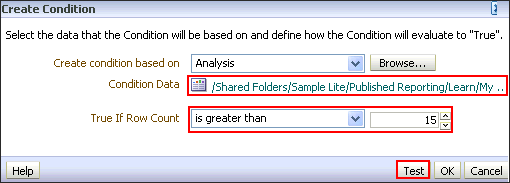 c. Select is greater than from the True If Row Count operator drop-down list and enter 15 as the row count. d. Click Test to test the condition. The test result is displayed.  e. Click OK. If the result is false, change the condition count to get a positive result. |
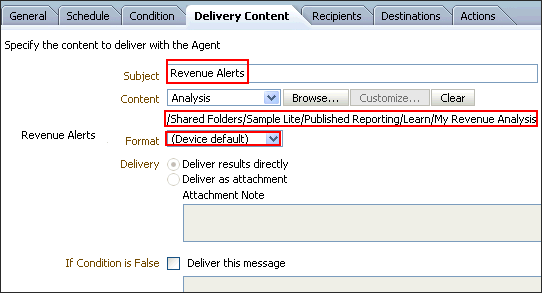
| 10 . | Click the Delivery Content tab to identify the content that will be delivered by the agent. Perform the steps given as follows:
|
| 11 . | On the Recipients tab, select the default option to identify the recipients of the agent. By default, weblogic is available. Remember that you have set the delivery options for "My Account" in the BI EE Home as Email. 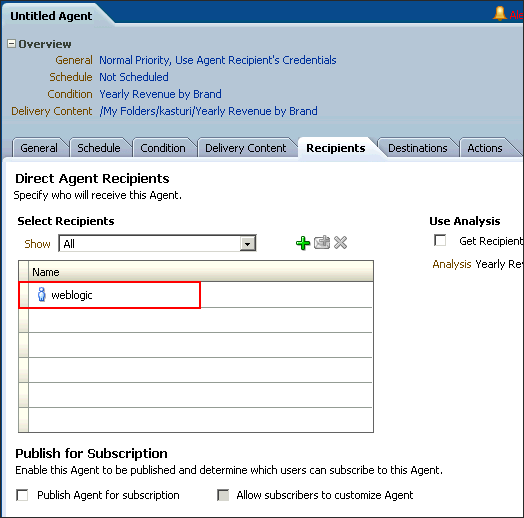 Note:
|
| 12 . | On the Destinations tab, select the destination for the agent. For User Destinations, select the Home Page and Dashboard check boxes. Deselect the Devices check box.  |
| 13 . | Click the Save button to save the agent. In the Save Agent dialog box, save the agent as Alert Revenue in theLearn folder. |
| 14 . | Click the Run Agent Now button. Verify that the agent is running in the Running Agent dialog box: When the agent has run successfully, you should receive a confirmation: Click OK. 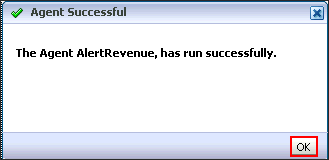 Verify that the agent ran successfully and generated alerts in the expected locations. These locations are Home Page and Dashboard, and the eMail Client. Verify that the agent ran successfully and generated alerts in the expected locations. These locations are Home Page and Dashboard, and the eMail Client.Note: The locations were specified in the User Destinations section, when you created the agent. |
Verifying the Mail Client for the Agent/Alert
In this topic, you verify the alerts generated by the agent that you created. The alerts appear on the Dashboard and the eMail client as well.
| 1 . | Navigate to the Home page. There is an alert in the Global Header. You can click the Alerts link in the Global Header to view the alert. |
|---|---|
| 2 . | Navigate to the Dashboard My Revenue Analysis and verify that the alert appears. Note: In the Alerts dialog box, you can edit or run the agent again by using the available buttons. |
| 3 . | Click OK to close the alert. |
| 4 . | Open your eMail Client (Outlook Express) to check for the alert eMails.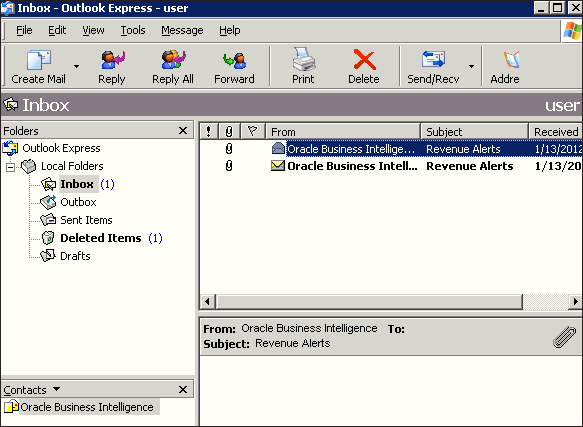 You see the messages sent by Oracle BI EE for the alert/agent that you created. |
| 5 . | Double-click the alert message to open it. The message is displayed with the details that you entered while creating the agent. The analyis is delivered as an attachement. Click the attached report to open it. 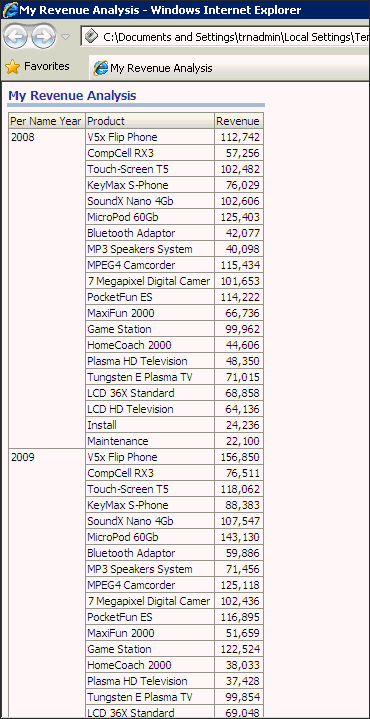 This concludes the topic of sending alerts through Oracle BI EE Delivers. |
Summary
In this tutorial, you should have learned how to:
| Install Mail Server (ArGoSoft Mail Server) | |
| Configure the User Setting in the Mail Server and the local eMail Client | |
| Create an Analysis | |
| Create a Condition for Agent/Alert | |
| Verify the delivery to both the Dashboard and the eMail Client |
