DAC11g Installation.
1) Download DAC11g from OTN.
2) Extract the zip file.
3) Open the DAC extracted folder
4) Select DAC setup .exe file Run As Administrator.

5) Click on Next,

6) Specify the Informatica Location, Click on Next.

7) Here specify the domain.infa file, Click on Next,

8) Here enter the DAC Home location, Click on Next.

9) Here select the create icons for all user check box, Click on Next.

10) Click on Install.

11) Click on Yes to All,

11) Wait untill complete the progress.

12) Your installation is completed successfully, Click on Done.

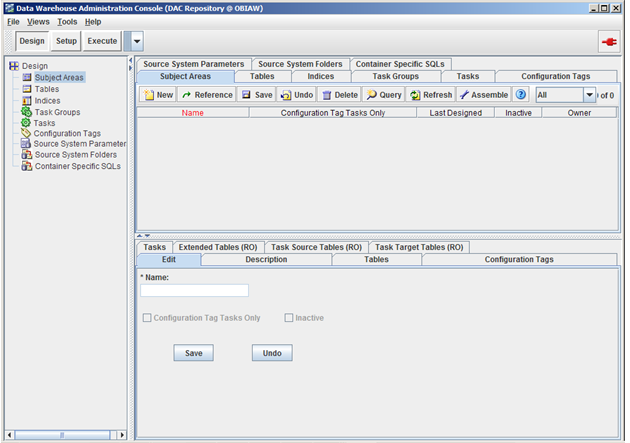
13) Go to start program files and select dac folder, Click on DAC Client,

Login Page.
14) Now Create dac user in the database and give role to dac user, See the below screenshot .

15) User created in the database.

16) Start DAC client-> Select Configure-> Select new connection.
Enter the connection name : OBIA
Select connection type : oracle(Tin)
Eneter service name : orcl.
Enter host name : kishore
Enter port no : 1521.

17) Select Authentication File -> First time select Create authentication file -> Click on OK.


19) Give Table owner name : dacuser ->Password : dac password -> Click on Generate radom Encryption Key
It will generate key 24 char key see the screen shot above.
20) Click on Test connection -> You will see the srccessfully established message->Close -> Click on ok.

21) Click on start client, Select connection from the drop down and enter the credentials first time.
User name : Administrator.
Password : Administrator.

22) Click on Yes, Enter the table owner name and password (table owner means dac repository username and password) as below screen shot.

23) Specify user name password for regulor login. In My case i am using credential
user name : Administrator
Password : obia

24) Close the dac window and login again -> Click on dac client -> In Login page enter credential
->Click on Login.
25) Click on Setup Tab, DAC System Properties Enter dac repository name and informatica Parameter location. Click on save.


28) select standalone mode.

29) Enter the dac server host name : kishore and port no : 3141. Click on Save.

30) To start server if it is web mode ->Go to toos->DAC Server Management->
start DAC Server.
Stop DAC Server.
Stop DAC Server.

31)

32) DAC server setup. -> Tools -> DAC Server Management -> DAC Server Setup.

Click on Yes.

33) Select connection type as Oracle (Thin).
Server nam : Orcl
Host name : kishore
Post no : 1521.
select Populate from preconfigured client connection

34) Click on Test Connection. It will give connection pass message -> Close ->Click on Save.

35) Import Applications ->Tools -> DAC Repository Management ->Import
(To import application before u have copy those files from OBIEE_HOME\Oracle_BI1\bifoundation\biapps\dwrep\dac_client\server ->open exprot folder and copy all applications and move to DAC_HOME\dac\export.)
select the applications based on your ERP version in my case it EBS12.1.3


36) Click on OK.

37) Now create a new container to modify the parameters in dac. After import completed u have to create the new container as a existing container, Because if you want to modify any thig in the dac it will not allow you , You have to created new container. See the below screen shot for more details.
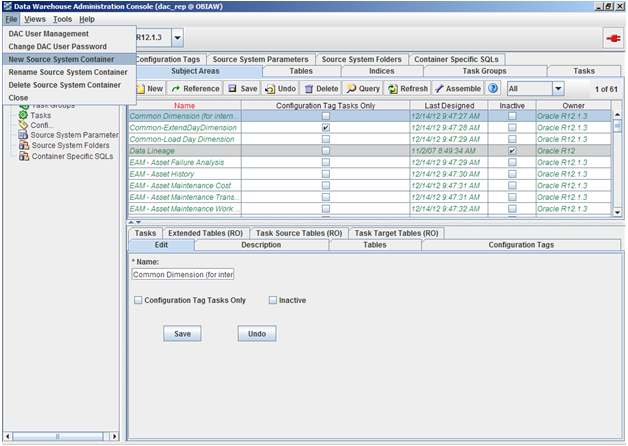
38) Container Id : 11
Container Name : EBS_R12.1.3
Select Existing Container.


Container created successfully.
39) Email Configuration.
User Name : kishore
Password : xxxxxx
Email Server : smtp:gmail.com
Port No : 465
Email id : kishore1188@gmail.com

Click on Send Test Email. Done.

40) Enter Informatica details to integrate informatic server and dac server.
Integration service
Service Name : info_is
Domain Name : Domain_kishore
User name : Administrator
Password : Administrator
Repository Name : info_rep
 Click on Test connection, Click on Save.
41) Enter informatica repository details to integrate informatica server and dac server.
Service Name : INFO_REP
Type : Informatic
Host Name: kishore
Port No : 6005
User Name : Administrator
Password : Administrator
Repository Name : INFO_REP.

Click on Test Connectionn -> Click on Save.
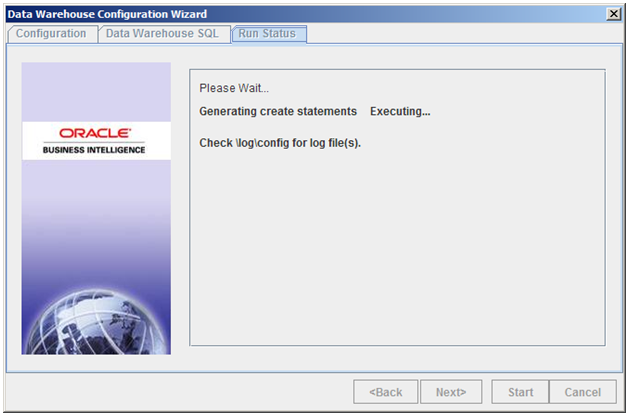
42) Generate the warehousing tables in the database. Using dac client.
Tools -> ETL Management -> Configure Source system
Select : Generate create statement for data warehousing Tables

Click on Next.

43) Select Execute check box.
Select Physical Data Source type Datawarehouse
Click on start.


45) To check the Repository Stamp -> Help -> Login details
Here you can see all information related to dac repository.
46) In the new version of DAC11g You have keep generated 24 chra lenght key safetly, If you for get password , If you want to create new connection that time u have user this key again. or else you cont login to dac . it will give error key is not matched in the repository.
1) Download DAC11g from OTN.
2) Extract the zip file.
3) Open the DAC extracted folder
4) Select DAC setup .exe file Run As Administrator.

5) Click on Next,

6) Specify the Informatica Location, Click on Next.

7) Here specify the domain.infa file, Click on Next,

8) Here enter the DAC Home location, Click on Next.

9) Here select the create icons for all user check box, Click on Next.

10) Click on Install.

11) Click on Yes to All,

11) Wait untill complete the progress.

12) Your installation is completed successfully, Click on Done.

13) Go to start program files and select dac folder, Click on DAC Client,

Login Page.
14) Now Create dac user in the database and give role to dac user, See the below screenshot .

15) User created in the database.

16) Start DAC client-> Select Configure-> Select new connection.
Enter the connection name : OBIA
Select connection type : oracle(Tin)
Eneter service name : orcl.
Enter host name : kishore
Enter port no : 1521.

17) Select Authentication File -> First time select Create authentication file -> Click on OK.
18) Give the connection name -> click on OK.
It will generate key 24 char key see the screen shot above.
21) Click on start client, Select connection from the drop down and enter the credentials first time.
User name : Administrator.
Password : Administrator.
22) Click on Yes, Enter the table owner name and password (table owner means dac repository username and password) as below screen shot.
23) Specify user name password for regulor login. In My case i am using credential
user name : Administrator
Password : obia

24) Close the dac window and login again -> Click on dac client -> In Login page enter credential
->Click on Login.
25) Click on Setup Tab, DAC System Properties Enter dac repository name and informatica Parameter location. Click on save.
26) Go to toos->DAC server management->repository Configuration
27) Select web mode -> Click on Save (In the new dac11g there is two types security is available 1) web 2) standalone. for web u have to specify url, See the below screen shot).
This option is for when you integrate with weblogic that time you have to specify RUL or else you have to take standalone mode.
28) select standalone mode.
29) Enter the dac server host name : kishore and port no : 3141. Click on Save.
30) To start server if it is web mode ->Go to toos->DAC Server Management->
start DAC Server.
Stop DAC Server.
Stop DAC Server.
31)
32) DAC server setup. -> Tools -> DAC Server Management -> DAC Server Setup.
Click on Yes.
33) Select connection type as Oracle (Thin).
Server nam : Orcl
Host name : kishore
Post no : 1521.
select Populate from preconfigured client connection
34) Click on Test Connection. It will give connection pass message -> Close ->Click on Save.
35) Import Applications ->Tools -> DAC Repository Management ->Import
(To import application before u have copy those files from OBIEE_HOME\Oracle_BI1\bifoundation\biapps\dwrep\dac_client\server ->open exprot folder and copy all applications and move to DAC_HOME\dac\export.)
select the applications based on your ERP version in my case it EBS12.1.3
36) Click on OK.
37) Now create a new container to modify the parameters in dac. After import completed u have to create the new container as a existing container, Because if you want to modify any thig in the dac it will not allow you , You have to created new container. See the below screen shot for more details.
38) Container Id : 11
Container Name : EBS_R12.1.3
Select Existing Container.
Click on OK.
Container created successfully.
39) Email Configuration.
User Name : kishore
Password : xxxxxx
Email Server : smtp:gmail.com
Port No : 465
Email id : kishore1188@gmail.com
Click on Send Test Email. Done.
40) Enter Informatica details to integrate informatic server and dac server.
Integration service
Service Name : info_is
Domain Name : Domain_kishore
User name : Administrator
Password : Administrator
Repository Name : info_rep
41) Enter informatica repository details to integrate informatica server and dac server.
Service Name : INFO_REP
Type : Informatic
Host Name: kishore
Port No : 6005
User Name : Administrator
Password : Administrator
Repository Name : INFO_REP.
Click on Test Connectionn -> Click on Save.
42) Generate the warehousing tables in the database. Using dac client.
Tools -> ETL Management -> Configure Source system
Select : Generate create statement for data warehousing Tables
Click on Next.
43) Select Execute check box.
Select Physical Data Source type Datawarehouse
Click on start.
44) Data warehouse tables are created in the database., You will get success message at the end.
45) To check the Repository Stamp -> Help -> Login details
Here you can see all information related to dac repository.
46) In the new version of DAC11g You have keep generated 24 chra lenght key safetly, If you for get password , If you want to create new connection that time u have user this key again. or else you cont login to dac . it will give error key is not matched in the repository.