Overview
Template Builder is an extension to MS Word (2003 or later) that simplifies RTF template creation for Oracle BI Publisher reports.
Rich Text Format (RTF) is a specification used by common word processing applications, such as MS Word. Template Builder provides easy-to-use wizards for inserting fields, tables, forms, charts, and cross-tabs. Also, Template Builder provides translation features and enables you to preview reports by using the template in supported formats.
This tutorial provides step-by-step procedures to use Template Builder to create RTF templates for Oracle BI Publisher reports. The examples will cover complex formatting and processing of reports by using these RTF templates. You will also learn how to work in both Online and Offline modes. Translating the RTF templates is covered in detail in the other tutorial -: Exploring Advanced Features of BI Publisher 11g, and also in the Instructor Led Training (ILT) for BI Publisher 11g.
Prerequisites
To complete this tutorial, you should:
- Download the My Templates and Files zip file, and unzip in a folder with the same name.
- Create a Learn folder on your hard drive.
- Have access to the Samples files available in the Publisher Desktop Program menu.
- You will be using some of the reports that are similar to the ones you created in the OBE ' Getting Started with Oracle Business Intelligence Publisher'. These reports are provided to you in the My Templates and Files zip file.
- Complete the Getting Started with Oracle Business Intelligence Publisher OBE mentioned above.
- Install the required software.
The assumption throughout this course is that you are familiar with the basic user interface and navigation of the Oracle BI Publisher.
Software Requirements
The following is a list of software requirements:
- Microsoft Word (2003 or 2007)
- Java SE Development Kit (JDK) 5 or later (This also includes Java Runtime Environment [JRE]. JRE 1.6 or later is required.)
- MS .NET Framework 3.5 with SP1 or later.
- Oracle BI EE 11g installed on a machine that Template Builder can connect to by using HTTP.
- Oracle BI EE 11g should be able to connect to a supported data source.
Installing Template Builder and Exploring the Template Builder User Interface
In this topic, you will see how to download the Template Builder add-in, and install it. Then you will explore the the Template Builder user interface.
Installing Template Builder
Template Builder can be downloaded from the Get Started region of the Oracle BI Publisher Home page or Oracle BIEE Home page. In this topic, you will download the Template Builder add-in and install it.
Perform the following steps to download and install Template Builder:
| 1 . | Log in to Oracle BI Publisher. |
|---|---|
| 2 . | In the Get Started section of the Home page, click the Download BI Publisher Tools menu, and select Template Builder for Word.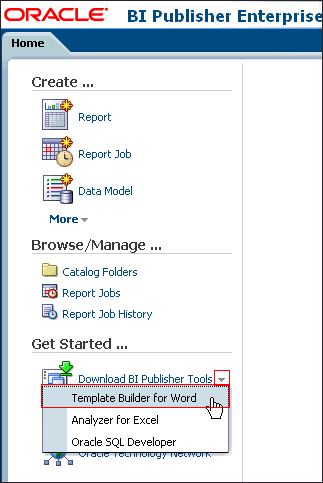 |
| 3 . | The Opening BIPublisherDesktop.exe dialog box opens. Click Save File. Save the file to a suitable location on your hard drive.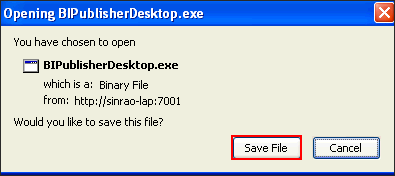 |
| 4 . | Navigate to the location where you have downloaded the BIPublisherDesktop.exe file and double-click the executable file to begin the installation.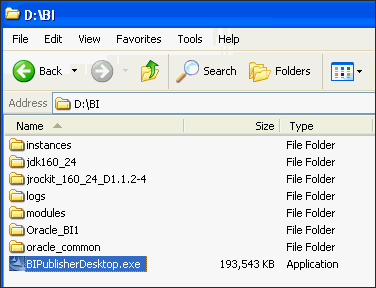 |
| 5 . | a. After the Install Shield wizard starts, follow the on-screen instructions to complete the installation. b. Click Finish. 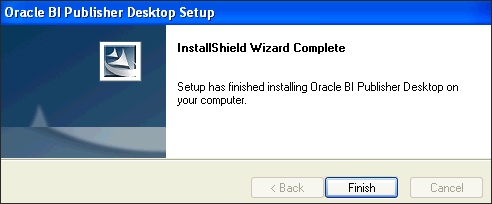 |
| 6 . | If Template Builder is installed correctly, you will see the BI Publisher ribbon in Word 2007: . .Note: If you are using Microsoft Word 2007 you may need to modify your Add-In settings: To do so, click the Office button, click Word Options, and then click Add-Ins. |
Exploring the Template Builder User Interface
In this topic, you will review Template Builder UI components. You will open the existing Balanceletter.rtf file.
(This file is made available to you in the My Templates and Files zip file, as well as in Sample after you install the Template Builder.)
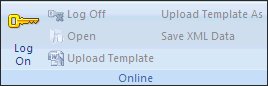
| 1 . | The BI Publisher ribbon has the following options:
|
|---|


Building an RTF Template in Offline Mode
Rich Text Format (RTF) is a specification used by common word processing applications, such as Microsoft Word. When you save a template in Template Builder, the file type should be RTF. You can build and upload your template via a direct connection with the BI Publisher Server, called Online mode, or you can build and upload your template in a disconnected mode, and is called Offline mode.
Note: To work in disconnected mode, you must have a sample data file available in your local work environment. In this example, the sample data file is Balance.XML.
| 1 . | a. Select Start >Programs >Oracle BIP Desktop >Samples >RTF Templates. b. Open the Balance Letter folder and load the file Balance Letter Start.rtf. This is a sample template file. 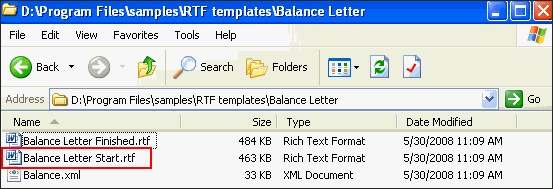 |
|---|---|
| 2 . | The RTF template file opens in MS Word.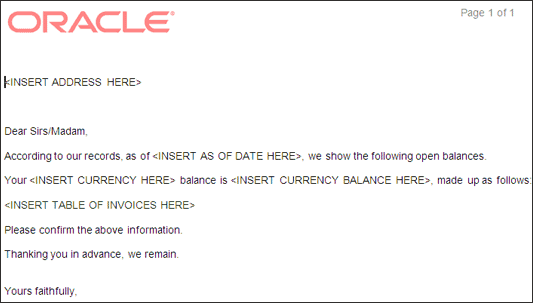 |
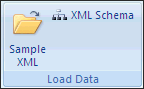
| 3 . | To build a report and view the report with data, you must load sample XML data. When working in disconnected or Offline mode, you must have sample data stored locally. a. Click Sample XML in the Load Data group. 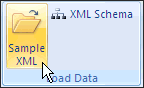 b. Select the Balance.xml sample data file located under your local drive(C):\Program Files\Oracle\BI Publisher\BI Publisher Desktop\samples\RTF templates\Balance Letter.Click Open. You will see a confirmation message that the data is loaded successfully.  |
| 4 . | a. Now insert the various fields in the Balance Letter by replacing the placeholders. Select the <INSERT ADDRESS HERE> placeholder, and click ab | Field, in the Insert group.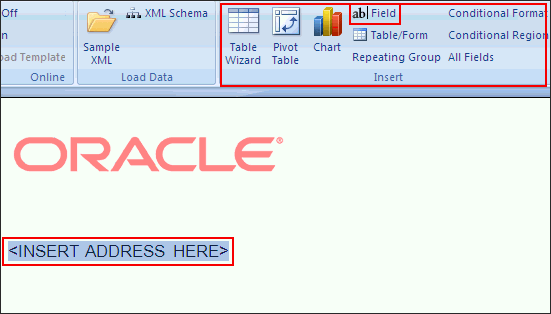 b. In the Field dialog box, select the Customer Name field and click Insert. 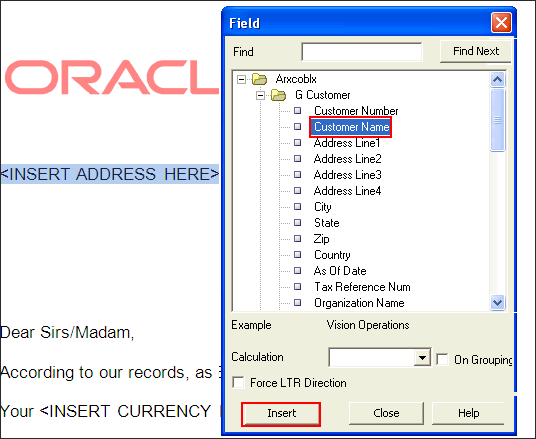 |
| 5 . | The Customer_Name field appears in the Balance Letter. Click the space following the CUSTOMER_NAME field and press Enter. This adds a line break.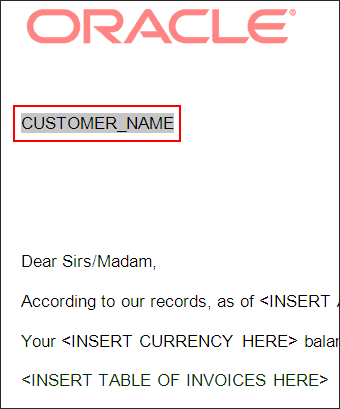 |
| 6 . | Repeat this process, adding Address Line1. Also, add City, State, and Zip, each of them separated by a comma and space. The letter should look like this: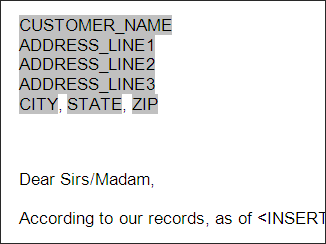 |
| 7 . | a. Insert the following fields into the letter, in the appropriate placeholders:
b. Close the Field Dialog box. 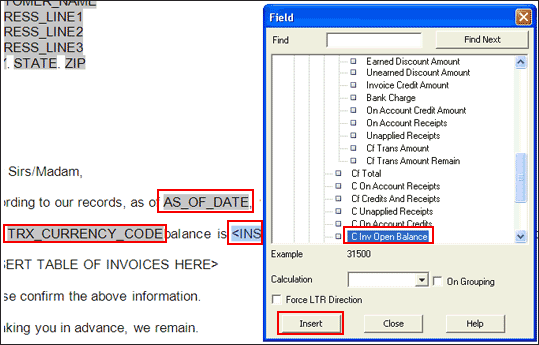 |
| 8 . | Include the table of invoices by using the Table Wizard. The Table Wizard allows you to add tables, forms, charts, and other objects. a. Select the <INSERT TABLE OF INVOICE HERE> placeholder in the form letter. Click Table Wizard in the Insert group. 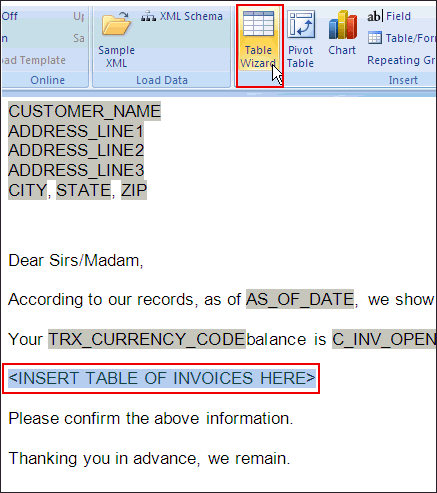 The Table Wizard opens. 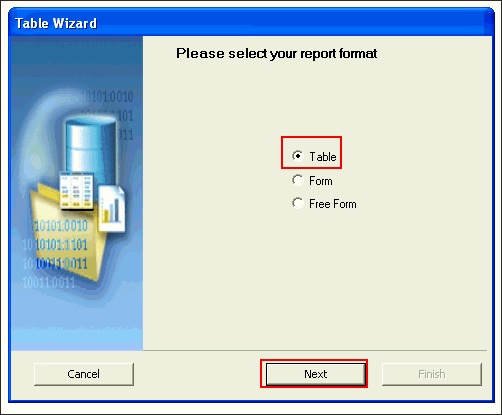 b. Accept the default (Table) and click Next. |
| 9 . | The Table Wizard intuitively selects the correct data set for you. In this example, it is/ARXCOBLX/G_CUSTOMER/G_CURRENCY/G_INVOICES. Accept the default and click Next.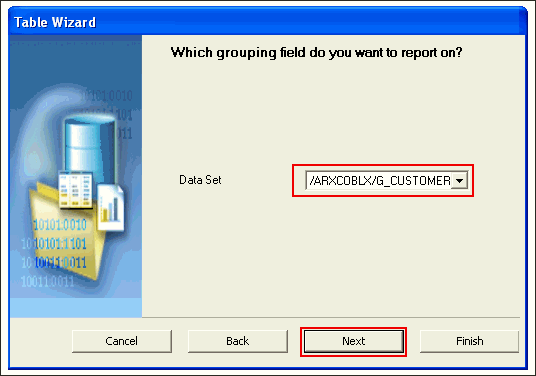 You can change this, however, by clicking the drop-down list. |
| 10 . | a. Select the following columns:
 to move items to the selected column one at a time or use the double-headed shuttle icons to move all columns at once. to move items to the selected column one at a time or use the double-headed shuttle icons to move all columns at once.Use the resequence icons 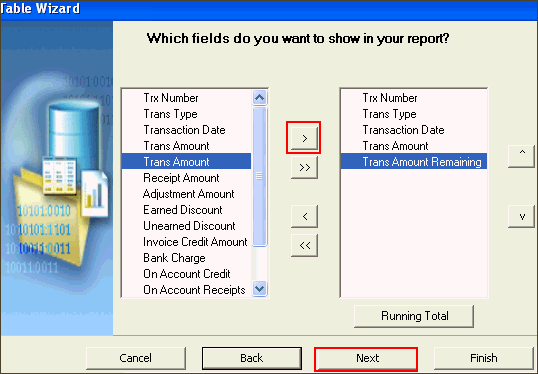 b. Click Next. |
| 11 . | You can group your data. You use the Break option to insert either a page break or section break after each occurrence of a group. In this example you will not select any options. Click Next.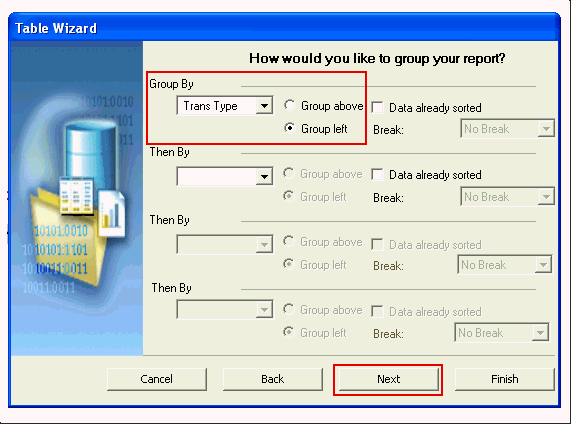 |
| 12 . | a. Select a sort sequence and indicate the type of data that is being sorted. Select Transaction Date, indicate that this field is a number, and sort the column in descending order. b. Click Finish. |
| 13 . | The table opens in the template. Observe the codes F (for "Grouping") and E (for "Each") in the table.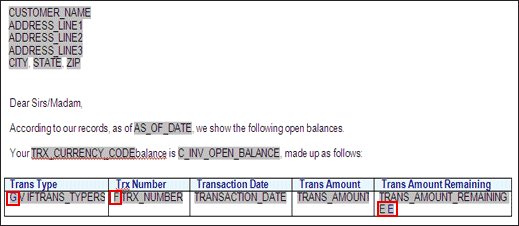 |
| 14 . | Preview this template in PDF format. In the Preview group, click PDF. The report is displayed with the XML file data that you loaded earlier. 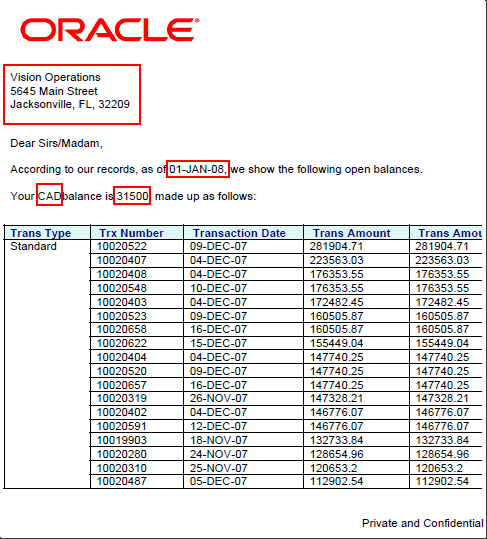 |
| 15 . | You can view the Word properties of any table field that you have added to your template. Double-click TRANS_AMOUNT in the table. The BI Publisher Properties dialog box is displayed. 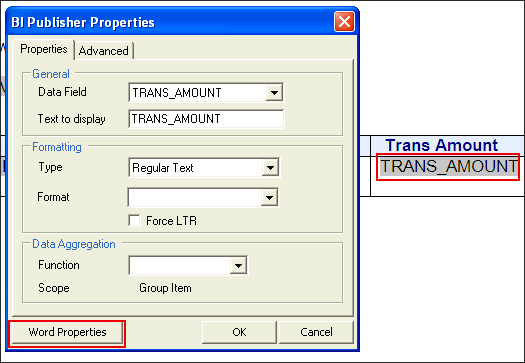 Click the Word Properties button to edit the inserted fields. |
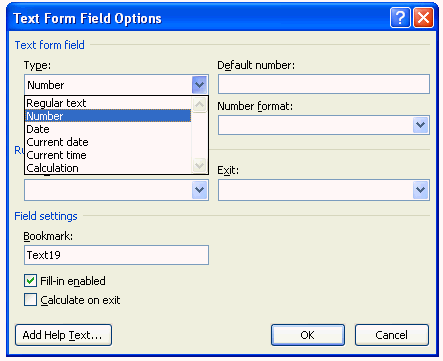
| 16 . | a. In the Text Form Field Options dialog box, select Number from the Type drop-down list. b. Set the default number and number format. Enter $1,000.00 in the Default number text box and select$#,##0.00 from the Number format drop-down list. 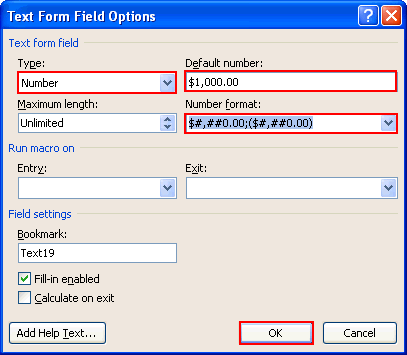 c. Click OK. The template is displayed with the applied formatting. 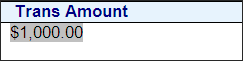 d. Right-justify this Trans Amount field by using MS Word Paragraph menu. |
| 17 . | You can format the other fields as per your requirement. However, because the date is a text field in this example, you will not be able to format it. You can also format the column names of the table to a meaningful display using the MS Word menu. Change the column names as given below and then keep the formatting as Bold.
 |
| 18 . | Save the template as My Balance Letter in the Learn folder on your local drive.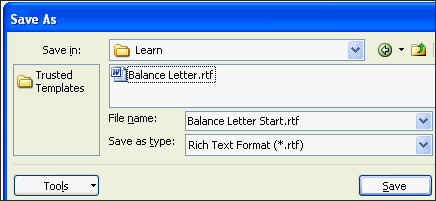 |
| 19 . | When you preview this template, the report is displayed with the applied formatting.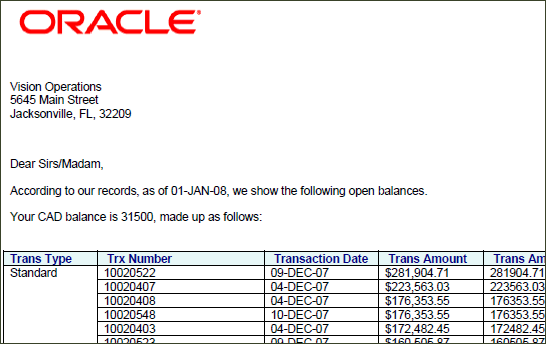 |
| 20 . | Close the preview and the template file. |
| 21 . | Log in to BI Publisher Enterprise Edition. |
| 22 . | On the Catalog page, navigate to the Balance Letter report and click Edit. This Balance Letter report is part of the Samples files. 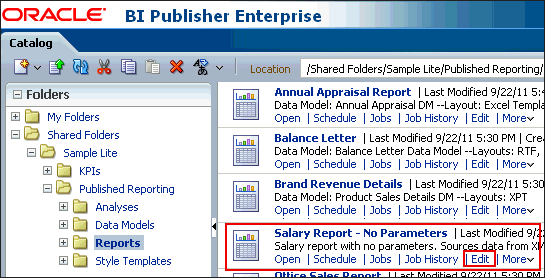 |
| 23 . | The Report Editor opens. Click Add New Layout.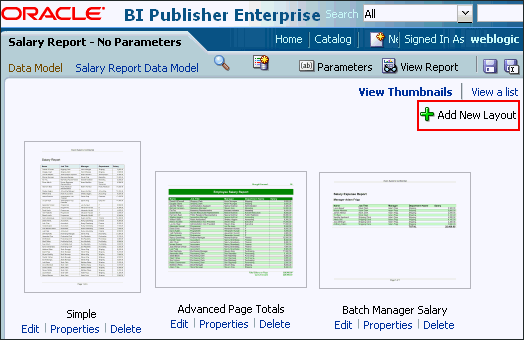 |
| 24 . | Click Upload. |
| 25 . | a. Enter Balance Letter as the layout name. b. Click Browse. Navigate to and select My Balance Letter.rtf from the Learn folder, and click Open. c. Select RTF Template as the type and English (United States) as the locale. . 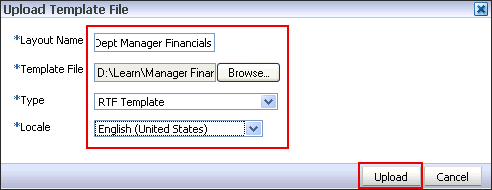 d. Click Upload. |
| 26 . | The uploaded layout is displayed in the layout editor. Click Save.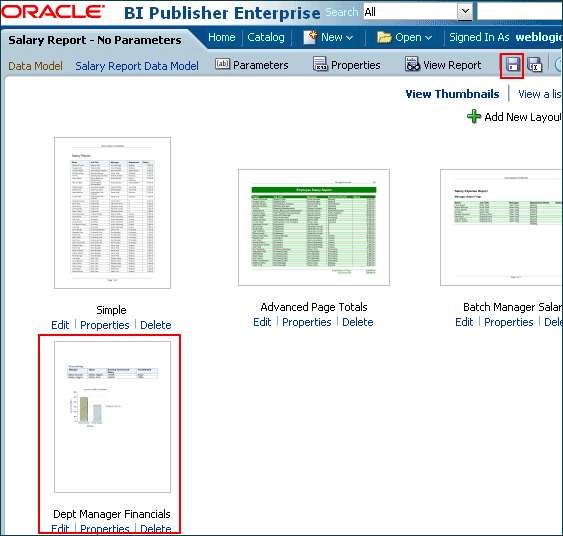 |
| 27 . | Click View Report. In the displayed report, click the Balance Report tab. The report based on the template that you have designed in Template Builder is displayed.  This concludes the topic on creating a RTF template using Template Builder in Offline mode. |
Building an RTF Template in Online Mode
This topic demonstrates how to design an RTF template while logged into BI Publisher.
You will log in to BI Publisher through Template Builder, define an RTF template, add a table with a running total, add grouping and sorting, add a page break, add a chart, preview data in the report by using the template, upload the RTF template to BI Publisher Enterprise Server, and view the report on BI Publisher Enterprise Server.
You will log in to BI Publisher through Template Builder, define an RTF template, add a table with a running total, add grouping and sorting, add a page break, add a chart, preview data in the report by using the template, upload the RTF template to BI Publisher Enterprise Server, and view the report on BI Publisher Enterprise Server.
| 1 . | a. Open a new blank word document. b. Log in to BI Publisher by clicking Log On in the Online group. 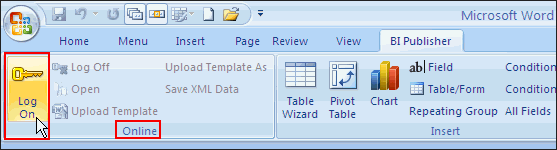 c. Enter the Report Server URL as the BI Publisher Server installed on your machine. For example, http://<host>:<port>/xmlpserver 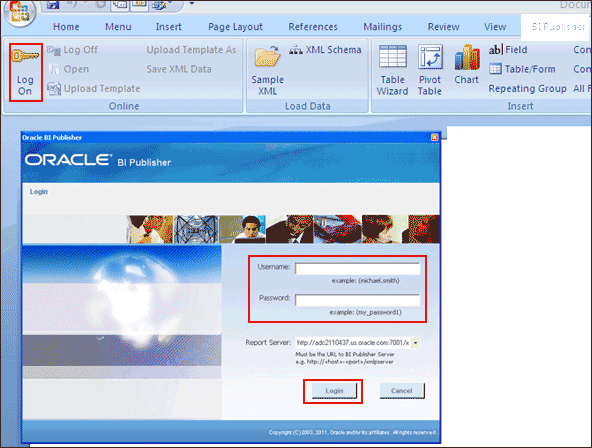 d. Click Login. | |||||||||||||||
|---|---|---|---|---|---|---|---|---|---|---|---|---|---|---|---|---|
| 2 . | The Open Template dialog box opens. Select the Salary Reports – No Parameters report. (Navigate to\Shared Folders\Sample Lite\Published Reporting\Reports\) | |||||||||||||||
| 3 . | When the report opens, you will not see any data in the blank MS Word document. However, XML data definitions are loaded from the report to facilitate the definition of a template. Notice that the report name appears in the title bar of MS Word beside the document name.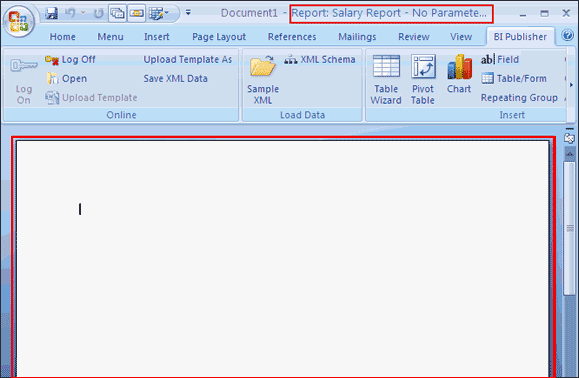 | |||||||||||||||
| 4 . | Now start building the template. Insert a word table with two rows. Insert the chart in the first row, followed by the table in the second. 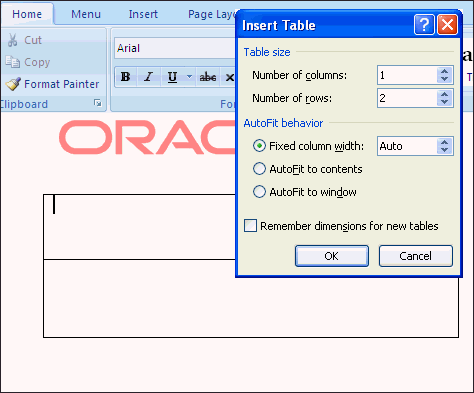 | |||||||||||||||
| 5 . | Now you will add a chart for this template. Position your cursor in the first row of the word table. In the Insert group, click Chart.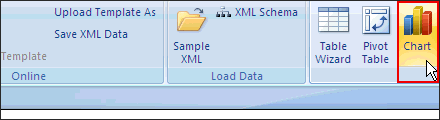 | |||||||||||||||
| 6 . | The Chart window opens. Select Row in the Data pane.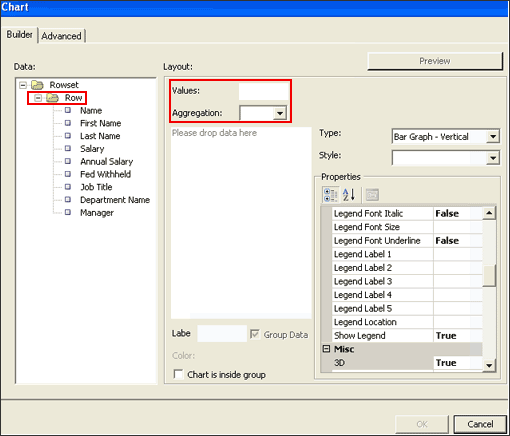 | |||||||||||||||
| 7 . | a. Drag Annual Salary to Values in the Layout pane. b. Drag Department Name to the Labels text box.  | |||||||||||||||
| 8 . | In the Layout pane, select the following information:
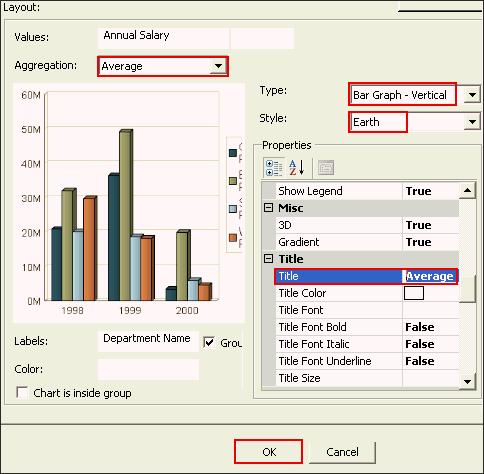 Click OK. | |||||||||||||||
| 9 . | The chart appears in the template.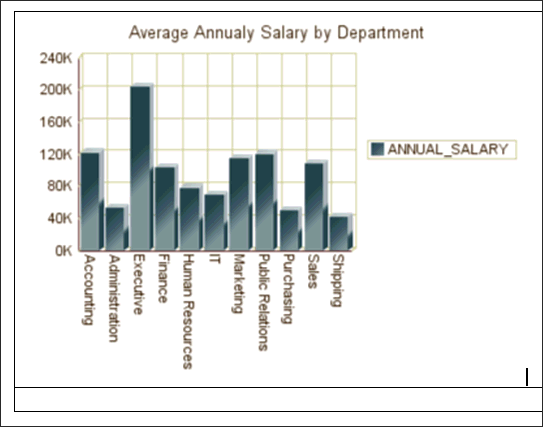 | |||||||||||||||
| 10 . | Now use the Table wizard to insert the table in your template. You did this in the previous topic, but in Offline mode. Take your curser to the next row of the MS Word table, and then insert the table. a. Select Department Name,Manager, Name, Job Title, Annual Salary, and Fed Withheld (in that order). Your selections should be listed in the right pane of the wizard page. 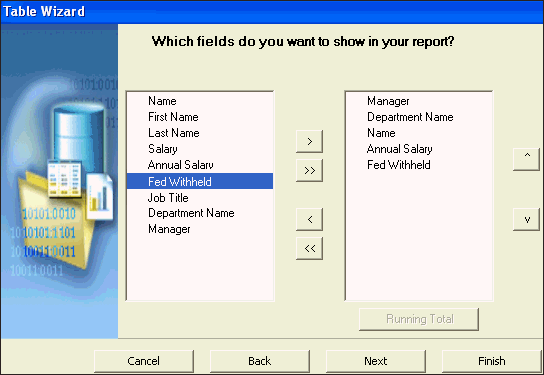 b. Click Next. | |||||||||||||||
| 11 . | In the How would you like to group your report? section, select the following options:
 Click Next. | |||||||||||||||
| 12 . | Sort by Annual Salary in the Which fields would you like to use to sort the data? section. Click Finish.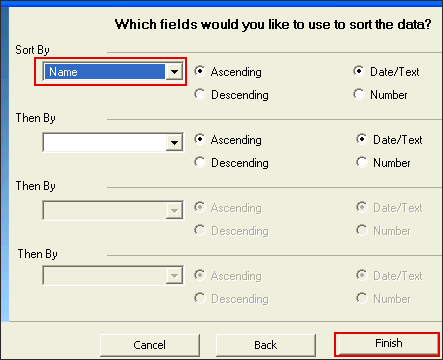 | |||||||||||||||
| 13 . | This table appears in the document, below the chart. Right-justify the cell for ANNUAL_SALARY.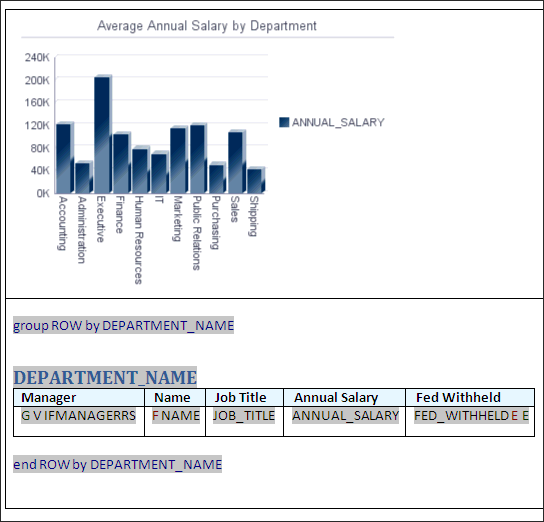 | |||||||||||||||
| 14 . | Save the file as Manager Financials Report.rtf in your Learn folder.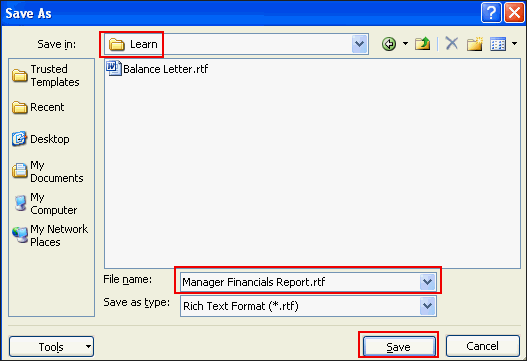 | |||||||||||||||
| 15 . | Select the PDF preview option from the Preview group. The PDF is displayed. Observe that because you used the “Group above” option while inserting the table, a department name appears above each table. | |||||||||||||||
| 16 . | Close the PDF. | |||||||||||||||
| 17 . | Now, upload the template to the BI Publisher Server. Click Upload Template As in the Online group. 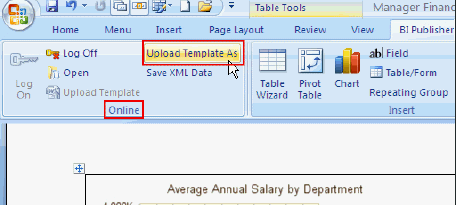 | |||||||||||||||
| 18 . | Upload as new dialog box opens. Enter Manager Financials Report as the Template Name.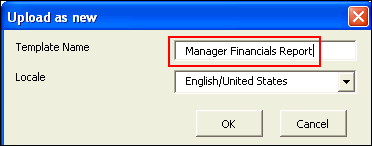 | |||||||||||||||
| 19 . | A confirmation message is displayed. Click OK.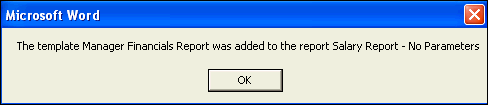 | |||||||||||||||
| 20 . | Navigate to the Salary Report - No Parameters report in the BI Publisher Enterprise Server and click Edit.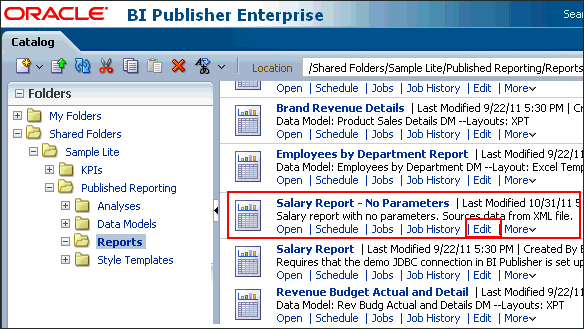 | |||||||||||||||
| 21 . | The uploaded layout is displayed in the layout editor. Save and then click View Report.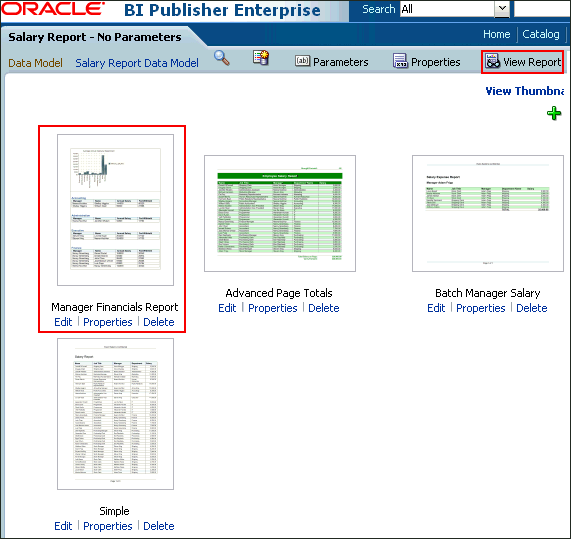 | |||||||||||||||
| 22 . | In the displayed report, click the Manager Financials Report tab. The report based on the template you have designed in Template Builder is displayed.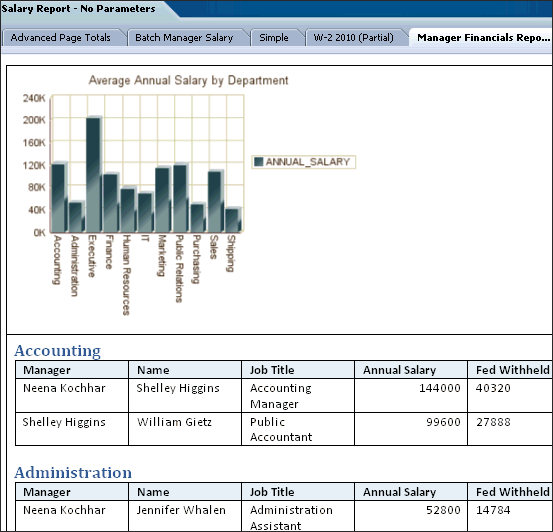 This concludes "Building an RTF Template in Online Mode" topic. |
Working with a Pivot Table in an Existing RTF Template
This topic covers adding a pivot table to an existing RTF template. You will open an existing RTF template to preview a chart, and add a pivot table to the template. The RTF template Retail Sales.rtf is stored in the My Templates and Files zip file.
| 1 . | Open the Retail Sales.rtf file in MS Word. The file looks like this: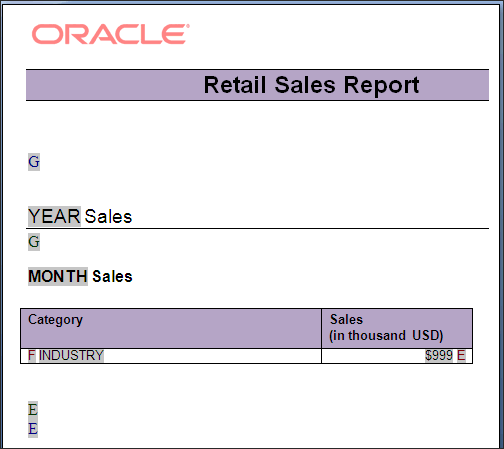 |
|---|---|
| 2 . | In the BI Publisher ribbon, click Sample XML in the Load Data group.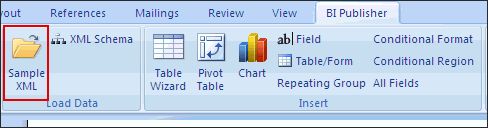 |
| 3 . | Navigate to and select RetailSales.xml (located in the same folder as the Retail Sales RTF template), and click Open. This file contains retail sales data from different industries.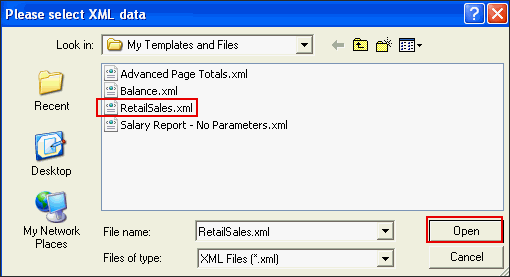 |
| 4 . | Click OK in the message dialog box. The data is loaded. |
| 5 . | Click Enter twice to enter a line break after the PIE Chart.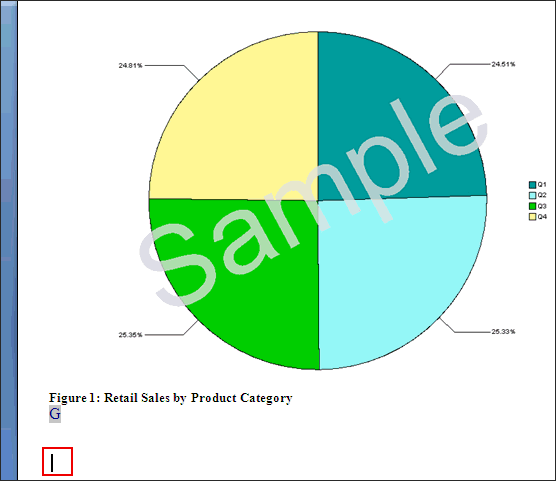 |
| 6 . | Click Pivot Table in the Insert group. The Pivot Table dialog box opens. You drag data columns from the Data pane to the blank Layout pane to build a pivot table. |
| 7 . | a. Drag Year to Columnb. Drag Month to Column c. Drag Industry to Row d. Drag Sales to the Please drop data here area.  |
| 8 . | a. Select Sales in the row. b. Select the cell to the right of Format in the Properties pane to select SUM. c. Select #,##0 in the properties drop-down list.  d. Click OK. |
| 9 . | The pivot table appears in the template.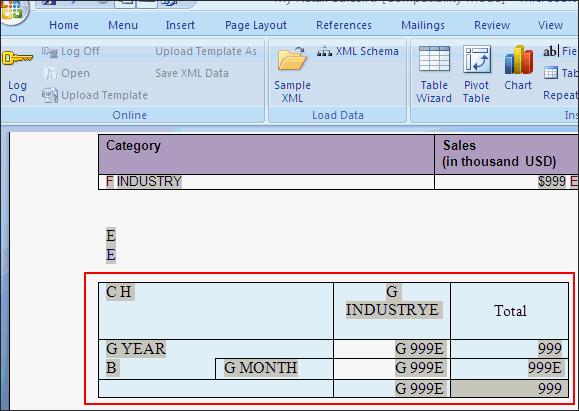 |
| 10 . | Save the template, and then click PDF in the Preview group to view your pivot table. This concludes the "Working with a Pivot Table in an Existing RTF Template" topic. |
Using Template Builder Utilities: Field Browser, Validate Template, and Check Accessibility
This topic will demonstrate how to use the Field Browser, Check Accessibility, and Validate Template utilities available in Template Builder.
You will use the Retail Sales.rtf file, which is made available to you at My Templates and Files zip file.
You will use the Retail Sales.rtf file, which is made available to you at My Templates and Files zip file.
Using Validate Template
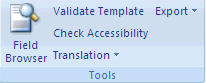
| 1 . | a. Open the RTF file Retail Sales.rtf.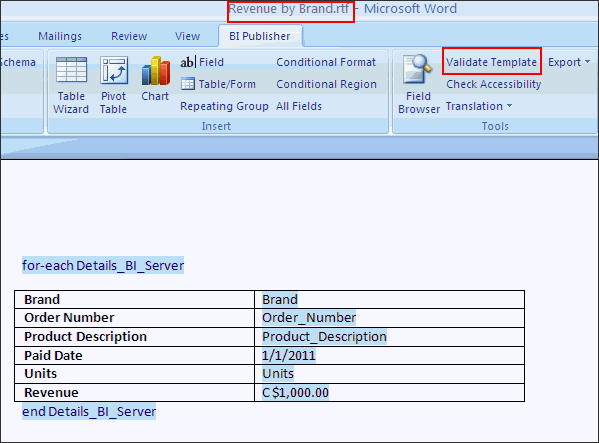 b. In the BI Publisher tab, in the Tools group, click Validate Template. |
|---|---|
| 2 . | If there are no validation errors, No Error found is returned.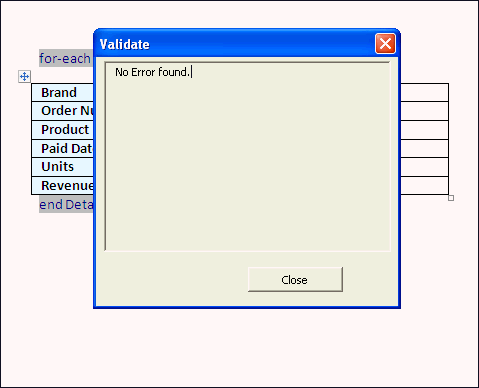 If an error is found, the error will be displayed. Note: You can also use Field Browser to help locate the error. |
Using Field Browser
The Field Browser utility provides a fast way to review and update the BI Publisher instructions hidden in the Microsoft Word form fields. This is particularly useful for understanding and modifying existing templates.
| 1 . | In the BI Publisher tab, in the Tools group, click Field Browser to open the Field Browser dialog box. |
|---|---|
| 2 . | The Field Browser dialog box shows the default text of the form field in the Text column, and the instructions (from the help and status text of the form field) in the Code column. Note:
|
| 3 . | You can update processing instructions directly from the Field Browser dialog box. a. Select INDUSTRY in the Text column.. 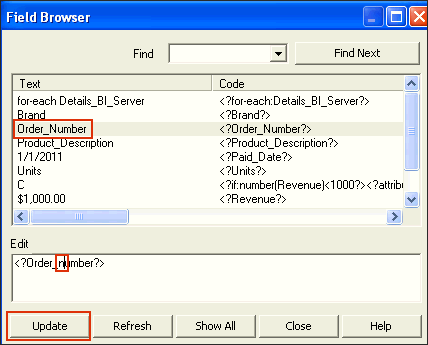 The Edit field shows the processing instructions. b. Change all but the first of the capital letters of the word INDUSTRY to lowercase. In other words, changeINDUSTRY to Industry. c. Select Update. 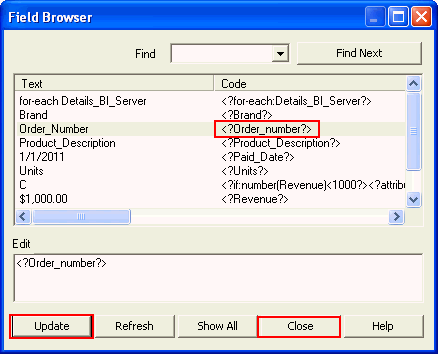 Observe that the code is changed as per your edit. Note: Recall from the previous topic that you can use Field Browser to find out validation errors in the template. Use the Find option in the Field Browser to search for the errors. |
Using Check Accessibility
Template Builder provides an accessibility checker to check the template for features to enhance the accessibility of the report for report consumers who may need assisting technologies to view the report. For more information about developing accessible reports, see "Designing Accessible Reports" in the Oracle Fusion Middleware Report Designer's Guide for Oracle Business Intelligence Publisher.
| 1 . | In the BI Publisher tab, in the Tools group, click Check Accessibility.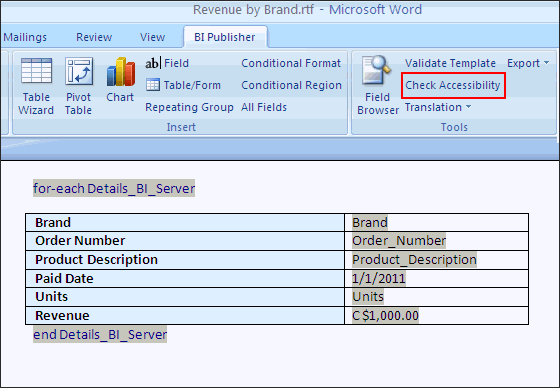 |
|---|---|
| 2 . | The tool generates a report indicating areas of your template that do not include the accessibility features.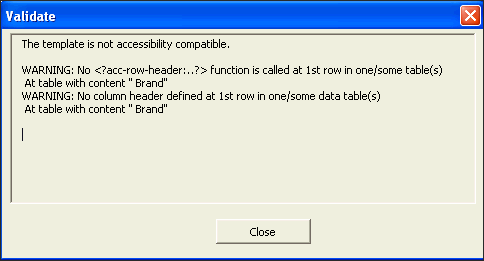 This template does not have accessibility compatibility for a row header of a table. For more information about developing accessible reports, see Designing Accessible Reports" in the Oracle Fusion Middleware Report Designer's Guide for Oracle Business Intelligence Publisher. |
Setting Configuration Options for Template Builder
In this topic, you will see how to set the various UI options and configuration options for Template Builder. The important settings covered are:
- The UI Options tab allows you to change some options that influence the look and feel of Template Builder.
- The Preview Options tab allows you to specify options that influence the Preview functionality of Template Builder.
- The Build Options tab allows you to specify options that influence how Template Builder generates tables and forms.
Setting UI Options
| The tree view showing the data source can show either the correct XML tag names of the data source or a slightly modified version that is easier to read. Select the Element Names for Reports XML option to show the modified labels. These labels contain no <> characters, use title case capitalization and use spaces instead of underscores. 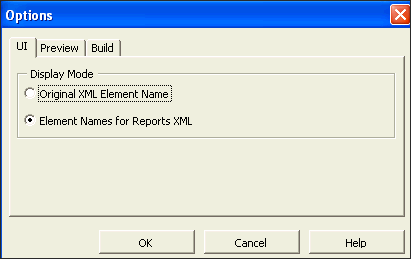 |
Setting Preview Options
| The Preview tab allows you to specify options that influence the Preview functionality of Template Builder. The various options that you can set using this dialog are:
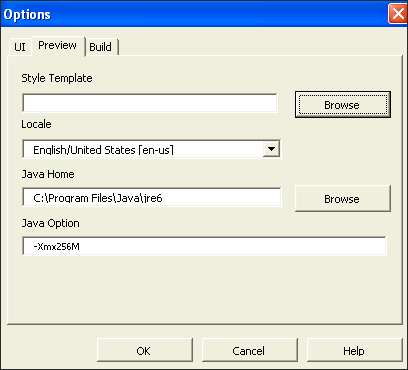 Style TemplateIf you have a BI Publisher style template available locally you can specify it here. The style information in the style template is applied to RTF layouts at runtime to achieve a consistent look and feel for your enterprise reports. In this example no style template is defined.For more information, see "Creating and Implementing Style Templates" in the Oracle Fusion Middleware Report Designer's Guide for Oracle Business Intelligence Publisher. LocaleYou can choose the language and territory used for previewing your template. While this change will not automatically translate any files, it is important to set the correct locale for the preview to use the correct direction of the text (left-to-right or right-to-left), and to correctly set locale-specific date, number, and currency formats. In this example the Locale is set to English - United States [en-US]Java HomeThe Preview (and export functionality) requires Java code. You can change the path to your JAVA HOME directory. If this option is not specified, Template Builder assumes that the Java virtual machine (java.exe) is accessible in the PATH specified in your environment variables of Windows. In this example it is set as C:\Program Files\Java\jre6Java OptionSpecify the memory to reserve for Template Builder to process the template. The default value is -Xmx256M. The example shows the same. |
Setting Build Options
| Use the Build tab to specify options that influence how Template Builder generates tables and forms. The various Build options that you can set here are:
 For-each form fieldUse this to choose how the Template Builder creates the form fields for processing instructions in the Insert Table/Form dialog box. The Descriptive option (for example: for-each Invoice) renders a descriptive form field for the processing instructions. This option makes the layout template easier to understand. However, the longer fields may distract from the visual layout of the template. The Abbreviated option (for example: F) provides a one letter abbreviation for each instruction.Select the Hidden option to generate the processing instruction form fields using Microsoft Word's hidden font effect. Hidden text is hidden in the print preview. You can display or hide the hidden text by selecting or deselecting the “Hidden text” option in the Display options of Microsoft Word Options. Form field sizeThe Large option inserts the BI Publisher code in a document variable. The document variable field can accommodate approximately 48 kilobytes of code line.Note that this setting affects only fields that are created or edited while this option is set. Table Header ColorWhen you insert a table by using the Table Wizard or the Insert Table/Form dialog box, the Template Builder applies the table header color specified here to the table header background. Use this feature to customize the default color for your templates.Generate XSLT 2.0 compliant codeBI Publisher uses the XSLT processor provided by Oracle XDK 11.1.0.7.0, which supports the W3C XSL Transformations 1.0 recommendation. The processor also implements the current working drafts of the XSLT and XPath 2.0 standards. For more information about Oracle XDK see Oracle XML Developer's Kit Programmer's Guide 11g.By default, BI Publisher is compatible with XSLT 1.0. If you wish to use XSLT and XPath 2.0 features in your template enable this option. This configuration is performed at the template level. The template-level setting will override the server setting. This concludes the "Setting Configuration Options for Template Builder" topic. |
Summary
In this tutorial, you have learned how to:
| Install Template Builder successfully | |
| Create an RTF template in the Offline mode | |
| Create an RTF template in the Online mode | |
| Create a chart and a pivot table in an existing template | |
| Configure Template Builder settings |